TikTok Pixel with Google Tag Manager tracking often breaks silently. A missing trigger, a duplicate event, or an unhandled consent signal can quietly drain campaign data for weeks. Setting up TikTok Pixel with GTM gives marketers a way to install, manage, and troubleshoot tracking without touching website code directly.
| What you’ll learn in this article: ● What Is TikTok Pixel in Google Tag Manager? ● What You Need Before Setting Up TikTok Pixel with GTM ● How to Install TikTok Pixel Using Google Tag Manager ● How to Verify Your TikTok Pixel Is Working |
What Is TikTok Pixel in Google Tag Manager?
TikTok Pixel is a tracking code built by TikTok. This code collects user behavior data on a website. Advertisers use this data to measure campaign performance.
Google Tag Manager acts as a central hub for managing tracking codes. This tool lets businesses install TikTok Pixel without editing website code directly. As a result, marketers save time and reduce technical errors.
When integrated through GTM, TikTok Pixel records key events. These events include page views, add-to-cart actions, and completed checkouts. Additionally, the system captures form submissions and account registrations.
Pixel data then syncs back to TikTok Ads Manager. Consequently, advertisers refine their target audience based on real behavior. At the same time, they measure campaign ROI with greater accuracy.
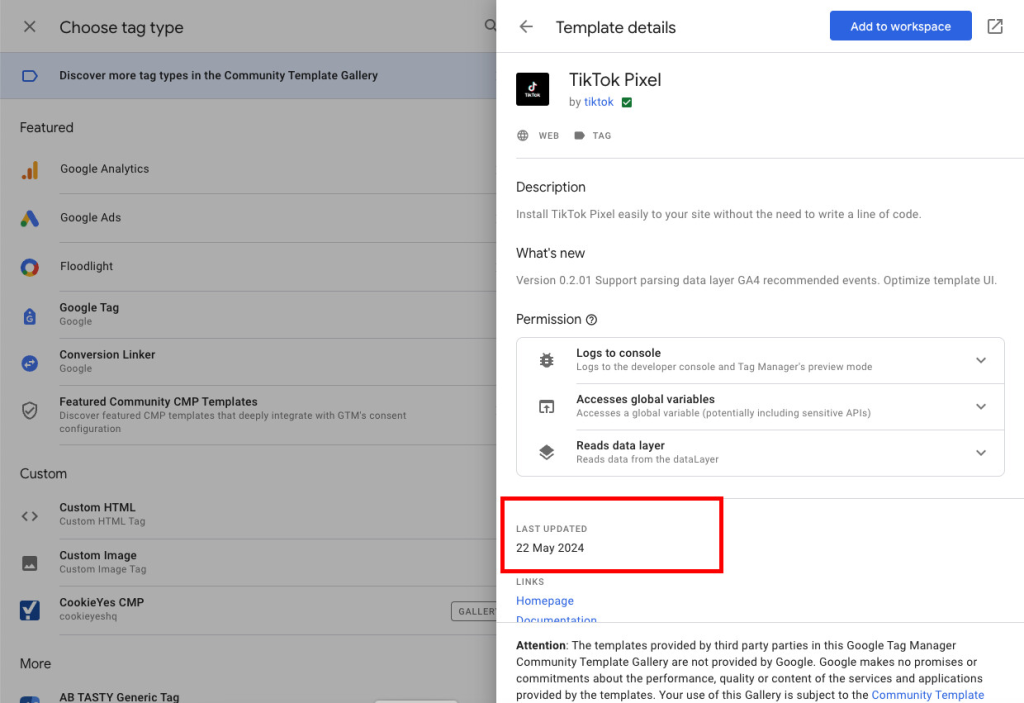
What You Need Before Setting Up TikTok Pixel with GTM
Setup requires a few essentials first. Without them, the process stalls halfway through. Here’s what you need to prepare.
TikTok Ads Manager account
You need an active TikTok Ads Manager account first. TikTok generates the Pixel ID in Events Manager, where you create and manage your data sources. Without it, Google Tag Manager has nothing to connect to, and no event data will flow to TikTok.
Google Tag Manager account
A GTM account manages all tracking tags in one central place. Marketers create containers and configure tags directly here. The account also grants permission to preview and publish changes live. Furthermore, teams can assign multiple users to collaborate on the same container.
Website with GTM container installed
Your website must already have the GTM container snippet installed correctly. Developers usually place this code in the site’s header section. Some platforms, like WordPress or Shopify, offer plugins for quick installation. Otherwise, no tag can fire correctly, and tracking will fail silently.
Access permissions
Proper access permissions matter just as much as the tools themselves. Admin rights allow full control over both TikTok Ads Manager and GTM. Meanwhile, limited permissions can block key setup steps like publishing or editing tags. Therefore, confirming access levels early saves time during configuration.
How to Install TikTok Pixel Using Google Tag Manager
Installing the Pixel through GTM can happen two ways: fully manual, or with an app like TagFly handling the technical setup. Both approaches start from the same TikTok Ads Manager step, so here’s how each path unfolds.
Option A: Manual Setup
This path suits teams who want full control over every tag and trigger inside GTM. It takes more manual steps, but nothing runs through a third-party app.
Step 1. Create a TikTok Pixel
Log in to TikTok Ads Manager first. and open Events Manager. For most accounts, go to Tools > Events > Connect data source > Web, then choose TikTok Pixel + Events API. Some accounts may still see the legacy path under Assets > Events > Web Events > Create Pixel.
Next, enter a name that reflects your website or domain.
Step 2. Get Your Pixel ID
After creating the pixel, TikTok generates a unique Pixel ID automatically. Locate this ID on the pixel’s details page inside Events Manager. Copy the full base code alongside the ID, since GTM needs this snippet in the next step.
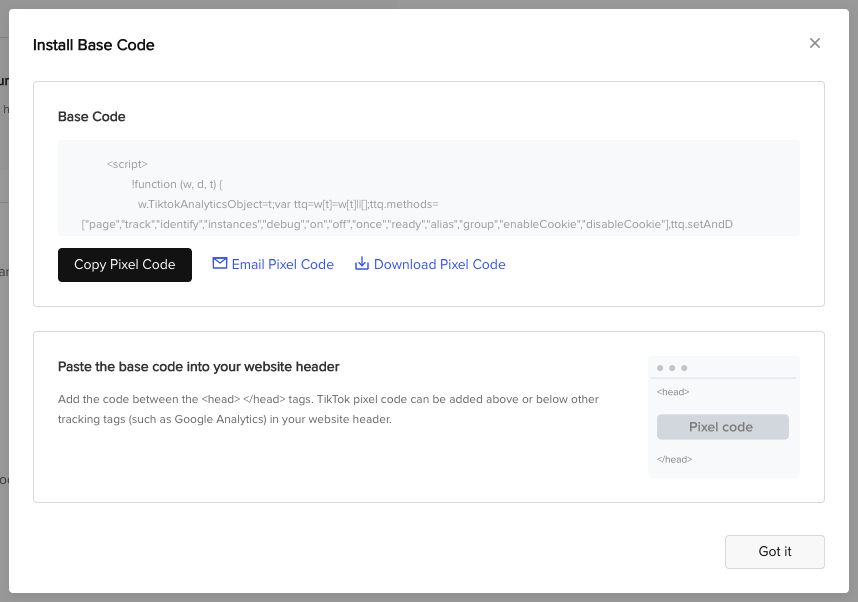
Step 3. Add a TikTok Pixel Tag in Google Tag Manager
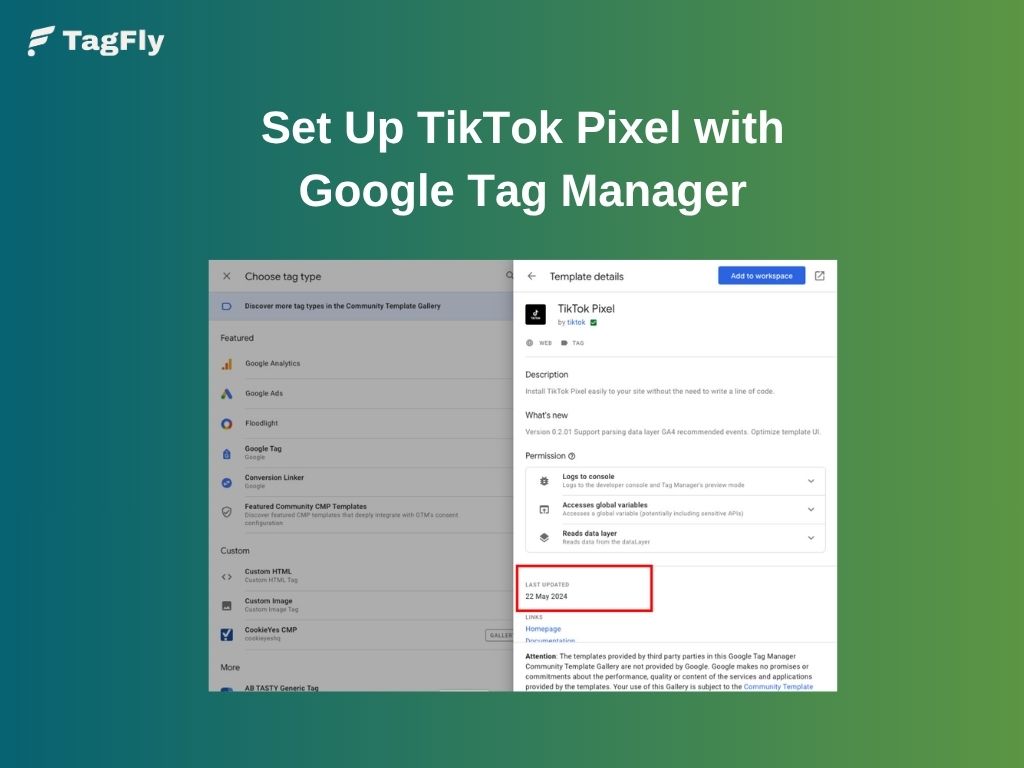
Open your GTM account, then go to Tags and select New. Choose Custom HTML as the tag type. Paste the TikTok Pixel base code into the HTML field. Afterward, give the tag a clear name for easy identification. Click Save once the code is in place.
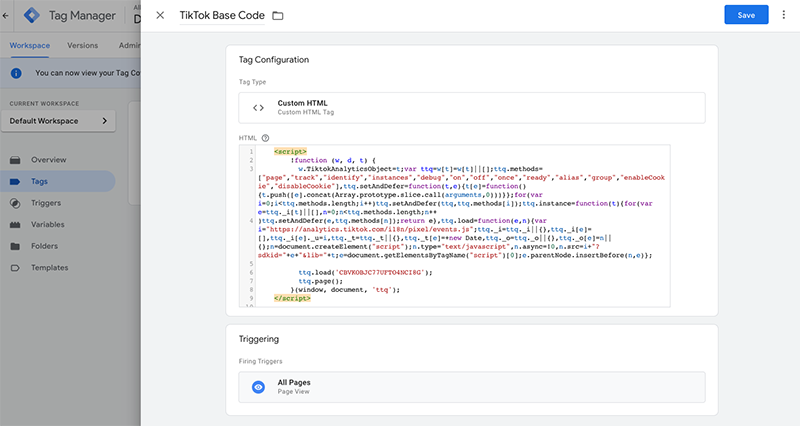
Step 4. Configure the Trigger
GTM will flag that no trigger has been selected yet. Click Add Trigger to proceed. Select All Pages as the trigger type. This setting ensures the Pixel fires across every page of your website. Save the trigger configuration when finished.
Step 5. Publish the Container
Review the tag and trigger setup one more time before going live. Click Submit, then Publish to push the container to your website. Once published, the TikTok Pixel becomes active and starts collecting data.
Option B: Using TagFly
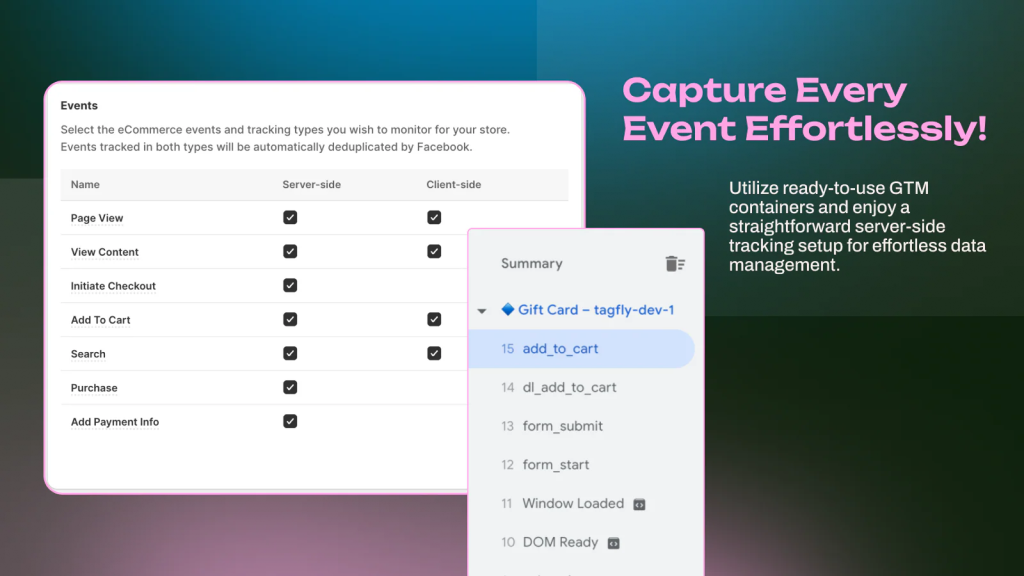
This path suits teams who want to skip manual tag-building inside GTM. TagFly handles the tag, trigger, and deduplication logic through a pre-built container instead.
Step 1. Connect your Google Tag Manager account to TagFly
Before connecting your TikTok Pixel, link your Google Tag Manager account inside TagFly. This allows the app to manage your GTM container automatically. If you choose Auto Setup, TagFly can create and publish the required GTM assets without requiring a manual container import later.
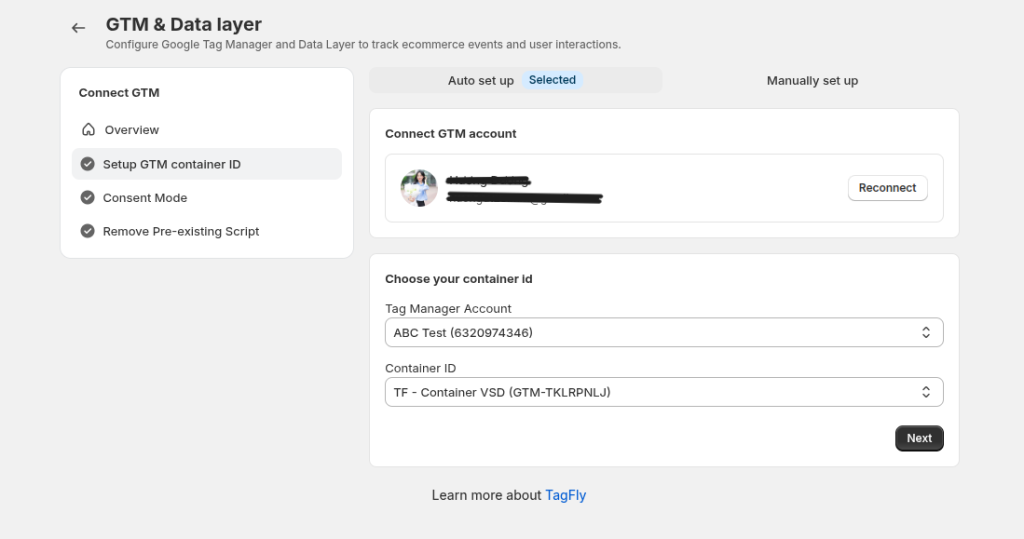
Step 2. Create your TikTok Pixel and get the Pixel ID
This part stays identical to Steps 1-2 in the manual method above. Create the pixel inside TikTok Ads Manager, then copy the Pixel ID from the pixel’s details page. If you also plan to run the Events API alongside the Pixel, generate an Events API Access Token from the same page while you’re there.
Step 3. Link the Pixel ID and Token to TagFly
Open the TagFly app and paste the Pixel ID into the TikTok setup field. Add the Events API Token as well if server-side tracking is part of the plan. TagFly then builds the tag, trigger, and deduplication logic automatically, skipping the manual tag creation and trigger setup covered in Steps 3-4 above.
Step 4. Import and publish the container
If you connected GTM using Auto Setup in Step 1, you can skip this step. TagFly automatically imports and publishes the required GTM container for you, so no manual import or publishing is needed.
Download the pre-built GTM container file from TagFly. Go to your GTM account, click Admin, then Import Container. Select the downloaded file, choose Merge, then Overwrite Conflicting Tags, Triggers and Variables.
Confirm the import, then click Submit and Publish in GTM. This single import replaces the tag setup, trigger configuration, and publishing steps from the manual method, combined into one workflow.
How to Verify Your TikTok Pixel Is Working
Verification confirms the Pixel actually sends data to TikTok. Skipping this step risks losing weeks of campaign insights without realizing it. Three methods cover most verification needs.
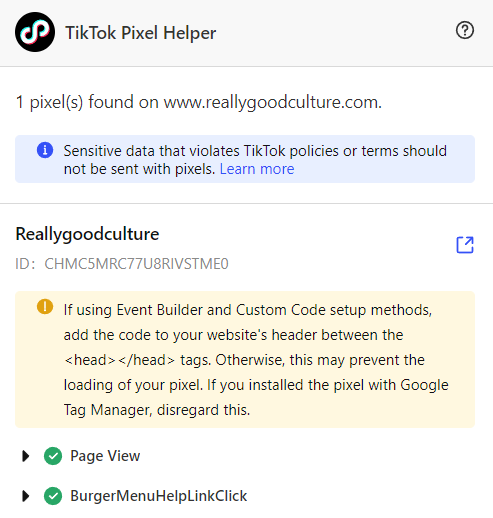
Use TikTok Pixel Helper
Install the TikTok Pixel Helper extension from the Chrome Web Store. Visit your website afterward and click the extension icon. The tool immediately flags whether the Pixel loads correctly and highlights any errors.
Check Events in TikTok Events Manager
Open Events Manager inside TikTok Ads Manager. Select the relevant pixel, then click Manage. Review the Diagnostics tab for warnings or missing parameters.
Additionally, use the Test Events feature to generate a QR code, scan it from the TikTok app, then perform actions on your site to watch events populate in real time.
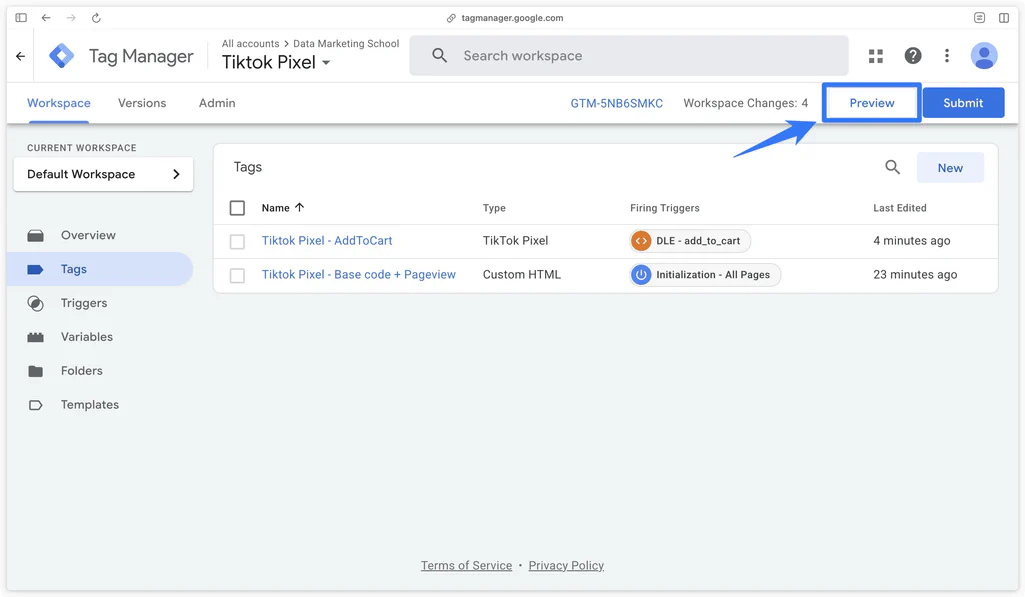
Test with GTM Preview Mode
Open your GTM container and click Preview. Enter your website URL to launch a connected debugging session. Perform key actions like viewing a page or adding an item to cart.
GTM’s Preview panel then shows whether the TikTok Pixel tag fired correctly for each action. This step catches trigger misconfigurations before they reach the live site.
Test Server-side Events in TagFly
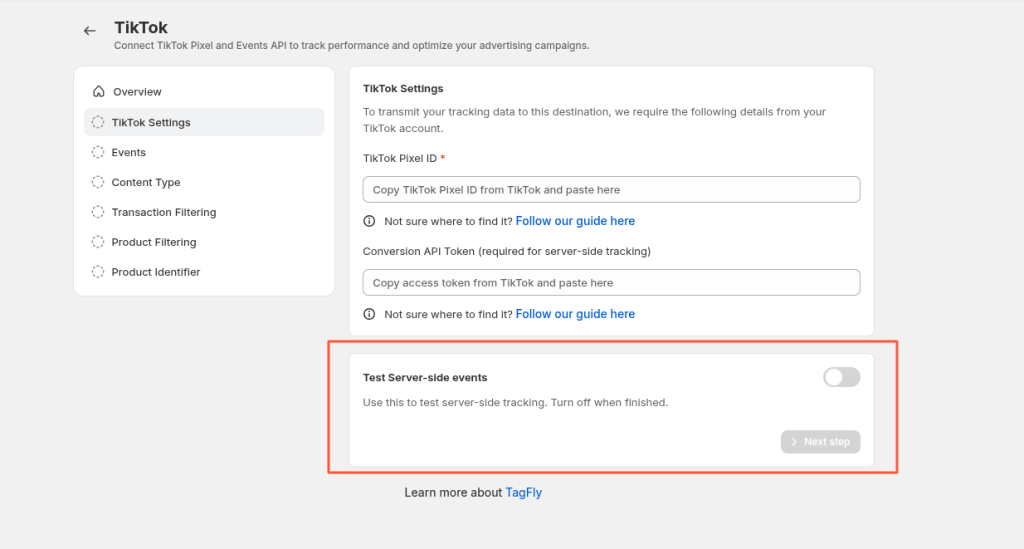
If you’re using TikTok Events API through TagFly, you can also verify server-side tracking with the Test Server-side events feature. Open your TikTok settings in TagFly and turn on Test Server-side events before performing actions on your website, such as viewing a product or completing a purchase.
This mode helps confirm that server-side events are being sent correctly during testing. Once you’ve finished verifying your setup, turn the feature off to resume normal tracking.
Common TikTok Pixel GTM Issues and How to Fix Them
Even a careful setup runs into snags. Most problems trace back to a handful of recurring causes. Below are the five issues marketers hit most often, along with practical fixes.
Pixel Not Firing
The Pixel sometimes fails to load on a page at all. Ad blockers or browser privacy settings often block the script before it runs. Incorrect trigger conditions in GTM cause the same problem.
How to fix: Check the trigger configuration first, then confirm the tag fires in GTM’s Preview mode. The TikTok Pixel Helper extension also confirms whether the pixel loads correctly on a live page.
Duplicate Events
Duplicate events inflate conversion numbers and distort ROAS calculations. This issue typically appears when both the Pixel and the TikTok Events API send the same event without a shared identifier. Without matching event_id parameters across both channels, a single purchase can fire twice, inflating conversions and undermining ROAS accuracy.
On the other hand, correct implementation pays off. Advertisers who run Pixel and Events API together typically see a 19 percent increase in captured events and a 15 percent improvement in cost per action.
How to fix: Generate a unique event_id and pass it through both the Pixel and the Events API. TikTok deduplicates overlapping Pixel events and Events API events when the same event_id arrives within a 48-hour window from the first event. Testing in TikTok Events Manager confirms whether deduplication works as intended.
Missing PageView Event
A missing PageView event usually points to an incorrect trigger setup in GTM. Sometimes the tag fires only on specific pages instead of firing sitewide.
How to fix: Set the trigger to “All Pages” unless a narrower scope is intentional. Checking the Network tab in browser DevTools also confirms whether the PageView request actually reaches TikTok’s servers.
GTM Preview Works But Live Site Doesn’t
This gap often comes down to an unpublished container. GTM Preview mode tests the workspace version, not the live version.
How to fix: Publish the container after testing to push changes live. Cache issues on the website’s hosting side can also delay updates, so clearing cache resolves lingering mismatches.
Consent Mode Considerations
Consent requirements now directly affect how much TikTok Pixel data actually reaches Ads Manager. Without proper consent handling, businesses can lose roughly 40 to 60 percent of conversions in tracking reports. Enforcement has already caught many sites off guard.
How to fix: Connect their consent management platform directly to GTM triggers. Doing so ensures the TikTok Pixel only fires after a visitor grants consent. Regularly auditing consent banner integration also prevents silent tracking gaps that go unnoticed for months.
Should You Use Google Tag Manager or a Shopify TikTok Pixel App?
Both approaches send data to TikTok correctly when set up right. The real difference lies in time, maintenance, and risk of error. Here’s how to decide.
Manual GTM setup works well for teams with a developer on hand. Full control over every tag and trigger comes with that territory. However, TikTok frequently updates its event parameters and deduplication rules. Someone still needs to monitor and adjust the container as these changes roll out.
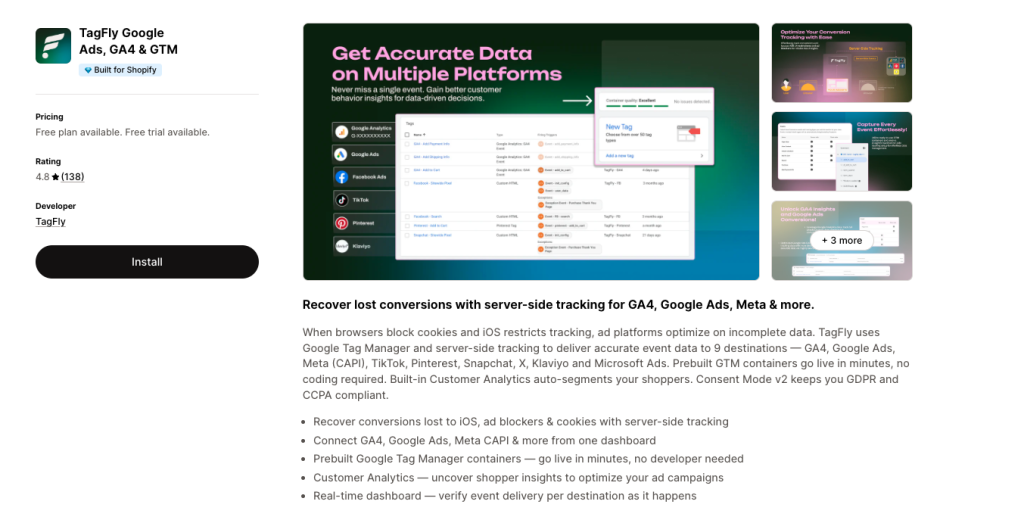
A Shopify TikTok Pixel app like TagFly removes most of that maintenance burden. The app handles the technical layer while store owners focus on campaigns instead. A few features make this option worth considering:
- Pre-built GTM containers: TagFly generates tags, triggers, and variables automatically, so no Custom HTML coding is required.
- Events API integration: Server-side tracking runs alongside the Pixel, which improves attribution when browsers block cookies.
- Built-in deduplication: Matching event_id parameters across Pixel and Events API happens without manual configuration.
- Consent Mode support: Tags respect visitor consent choices automatically, which helps avoid the data loss many sites face after enforcement.
- One-click updates: Changes to tracking logic roll out through the app instead of requiring a manual GTM edit each time.
Conclusion
TikTok Pixel with Google Tag Manager gives advertisers accurate, actionable data when set up correctly. Setup takes just five steps, yet small mistakes in trigger configuration or event deduplication can quietly distort campaign performance.
Regular verification through Pixel Helper, Events Manager, and GTM Preview mode catches these issues before they affect ad spend.