Google Tag Manager (GTM) is the backbone of your tracking setup. But how do you know if it’s actually working? Broken tags can lead to missing conversions, inaccurate reporting, and wasted ad spend. In this guide, you will learn how to check in Google Tag Manager, diagnose your common issues, and keep your tracking setup running smoothly.
When You Should Check Google Tag Manager
Some things can go wrong without your knowledge; after they get damaged, you cannot identify the errors until your data appears skewed. Identifying and knowing when to check on GTM may save you time and money.
After installing new tags or pixels
Even adding new marketing pixels, such as GA4 or TikTok, will require appropriate settings. Incorrectly setting even one may indicate that the events will not be triggered as intended. So, on every occasion, make sure to test right after publishing changes.
If you happen to use dynamic variables, it’s much more crucial to ensure they’re passing the correct information, or else your remarketing and conversion goals will most definitely not reach their targets.
After changing themes or updating Shopify
Theme updates or customized codes may wipe out or misplace the GTM container. Most installation reasons are mainly attributed to manual placement in theme files, where just a change deactivates all tags.
Even automatic updates from apps may cause bugs. Therefore, you should always re-check GTM after significant code or layout changes.
When you notice missing or weird data in reports
Your GA4 reports show suddenly fewer conversions compared to before. Do your Meta or TikTok pixels seem to record nothing? All of those forms of evidence make one consider that maybe your tags are broken.
Never regard only the dashboard of platforms, but use GTM tools to check the events right from the frontend of your store. That is how you catch problems before they skew results.
How to Check if Google Tag Manager is Working
If you’re confused whether your tags are firing or not, then don’t panic, it’s easy, and Google provides different ways to test your GTM container. Here are the most effective and up-to-date methods based on the current 2025 interface at present.
1. Use GTM Preview Mode
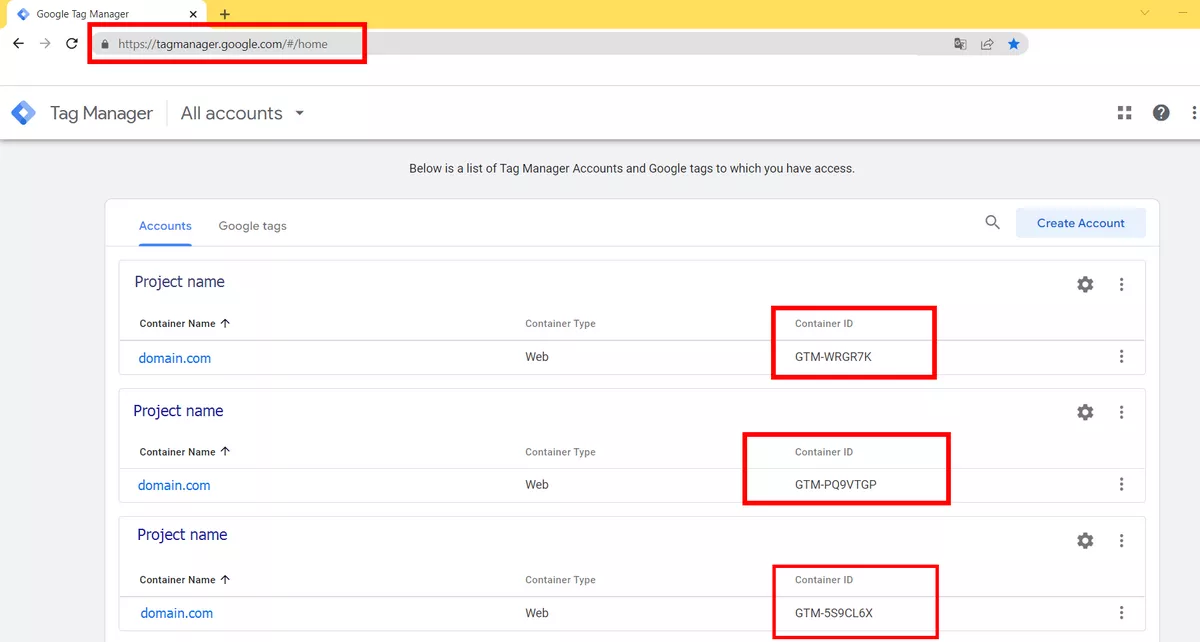
Step 1: Go to Google Tag Manager and open your GTM workspace: https://tagmanager.google.com/
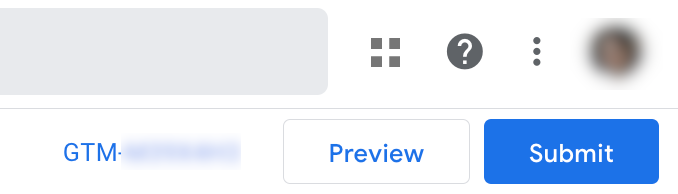
Step 2: Click the “Preview” button in the top right corner.
Step 3: Enter your store’s URL and click “Connect.”
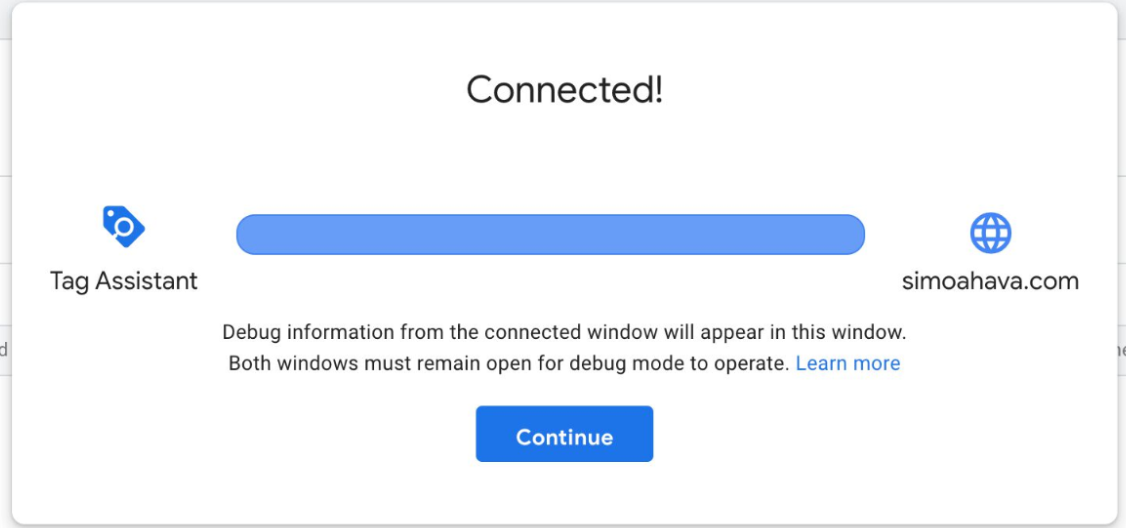
Step 4: A debug window will open on your site. Browse your store to see what tags fire.
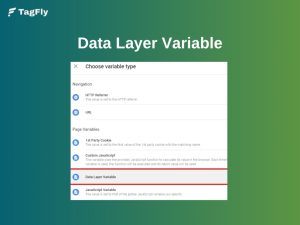
Step 5: Use the “Tags” and “Data Layer” tabs in the preview panel to inspect trigger behavior and variable values.
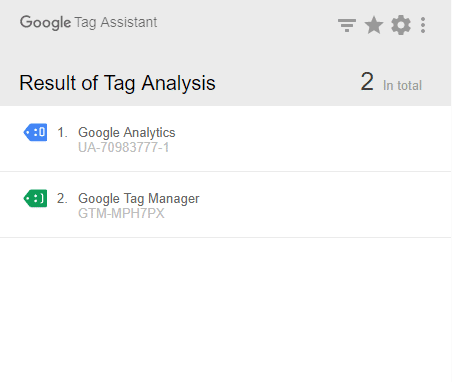
2. Use Google Tag Assistant
Step 1: Install the Tag Assistant Chrome Extension.
Step 2: Open your site in Chrome and click the Tag Assistant icon.
Step 3: Enable the extension, refresh the page, and review tag status.
Step 4: Look for container loading issues, firing errors, or warnings.
3. Use Chrome DevTools to inspect the dataLayer
Chrome DevTools lets you inspect both script behavior and network activity to confirm if GTM is working properly.
Step 1: Right-click anywhere on your website and select “Inspect” to open Chrome DevTools.
Step 2: Go to the Console tab and start browsing your site. Watch out for any errors or warnings related to gtm.js, “Google Tag Manager,” or scripts that failed to load.

If you see something like 404 not found for GET: gtm.js?id=GTM-XXXXXX, GTM is not loading correctly, double-check your container ID or script placement.
Step 3: Now switch to the Network tab, then refresh the page. In the search bar, type gtm.
You should see a line like gtm.js?id=GTM-XXXXXX with a status code of 200. That confirms GTM is firing properly.
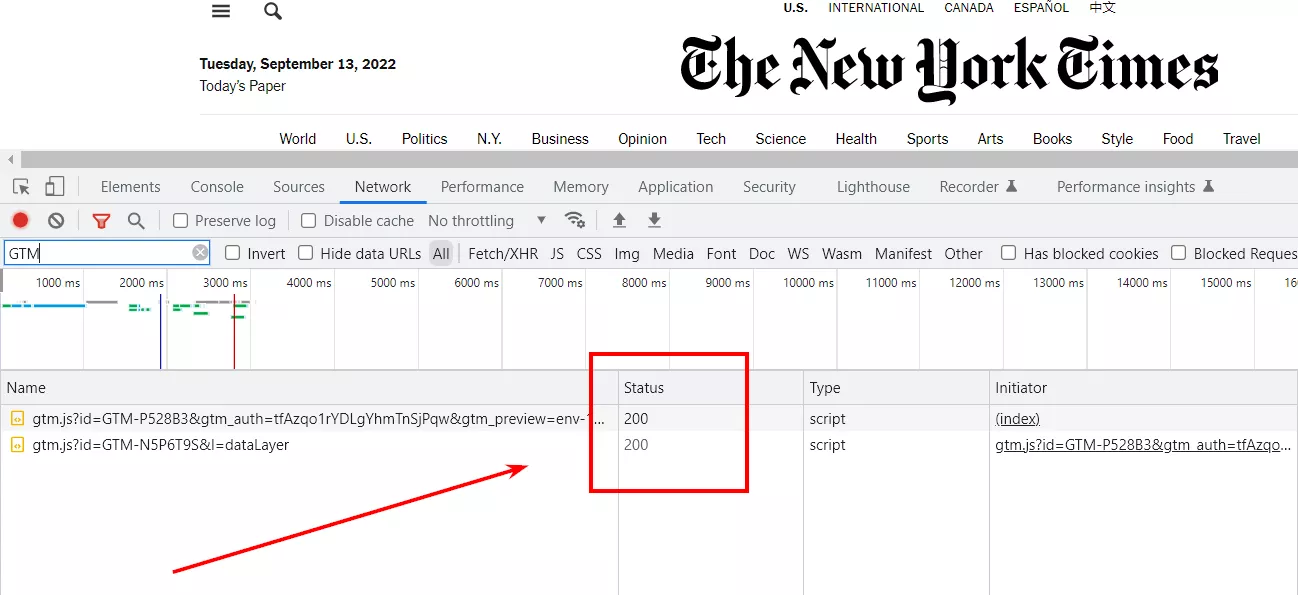
Step 4: If no gtm.js line appears, GTM might be blocked, not installed, or incorrectly configured. Time to revisit your setup!
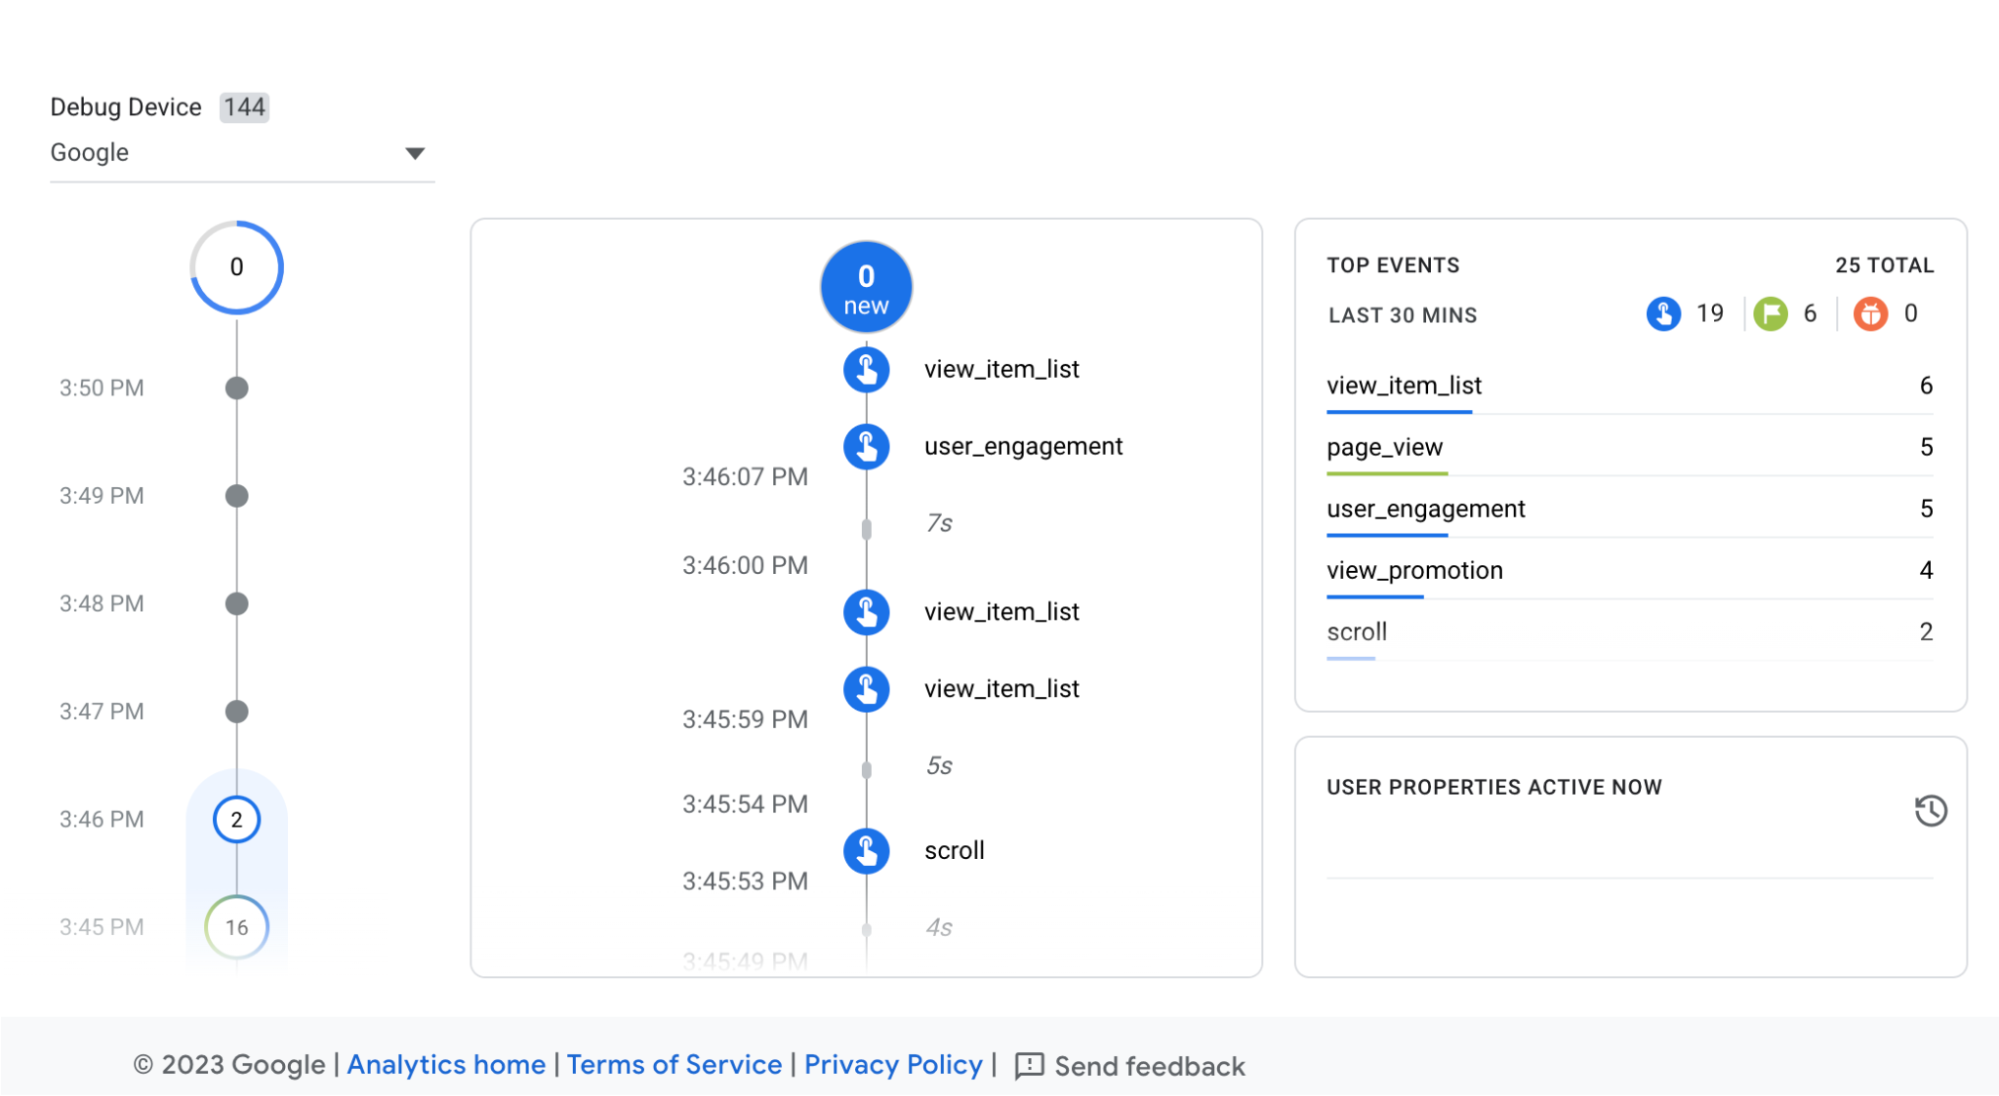
4. Use GA4 DebugView Integration (for GA4 via GTM)
- Step 1: In Google Analytics 4, navigate to Admin > DebugView.
- Step 2: Enable GTM Preview Mode and browse your site.
- Step 3: Check DebugView for real-time events (e.g., page_view, clicks) sent via GTM.
- Step 4: If no events show, verify your GA4 tag setup or Measurement ID in GTM.
Comparison of Google Tag Manager Testing Methods:
| Method | Best for | Skill Level | Setup Required |
| GTM Preview Mode | Testing tags and triggers in real time | Intermediate | GTM Workspace |
| Tag Assistant | Quick extension-based tag status check | Beginner | Chrome Extension |
| Chrome DevTools – dataLayer | Inspecting dynamic event data and custom variables | Advanced | DevTools Console |
| GA4 DebugView Integration | Validating GA4 events in real time | Intermediate | GA4 Admin & GTM Preview |
After testing your GTM setup, you should have a clearer picture of what is working and what is not. But even if the tags seem okay, hidden issues can still prevent the tags from collecting the data correctly. Let’s discuss some of the most common problems and their solutions.
Common GTM Tag Issues and How to Fix Them
Even with a well-set-up GTM container, some problems will occur, and you might never expect them. Especially as your site grows and changes, here is a quick rundown of a solution for each of them.
Tags not firing at all
Why it happens: The trigger condition isn’t met, or the tag is paused or unpublished.
How to fix it: Go to your GTM workspace > Tags > Click the tag > Check the assigned triggers. Use Preview Mode to confirm firing and adjust if needed.
Triggering at the wrong time or page
Why it happens: The trigger is too broad or too specific.
How to fix it: Make the conditions more narrow, either by using Page Path, CSS selectors, or built-in variables. Confirm the logic within GTM Preview Mode before publishing.
Missing or incorrect GTM container
Why it happens: Theme updates or manual edits remove the GTM code or change the container ID.
How to fix it: Reinstall the GTM code snippet in Shopify: Online Store > Themes > Edit Code > theme.liquid > place right after <head>.
Best Practices to Keep Google Tag Manager Working Smoothly
Checking once isn’t enough. To ensure long-term accuracy and performance, build habits around clean, consistent tag management.
Place GTM in the correct location
Always place the GTM container directly after the <head> tag. Tags are loaded early enough to track important events before a user leaves.
If it’s set so low down in the code, all activity may occur early and be missed, especially by rapidly bouncing or mobile users.
Use precise trigger conditions
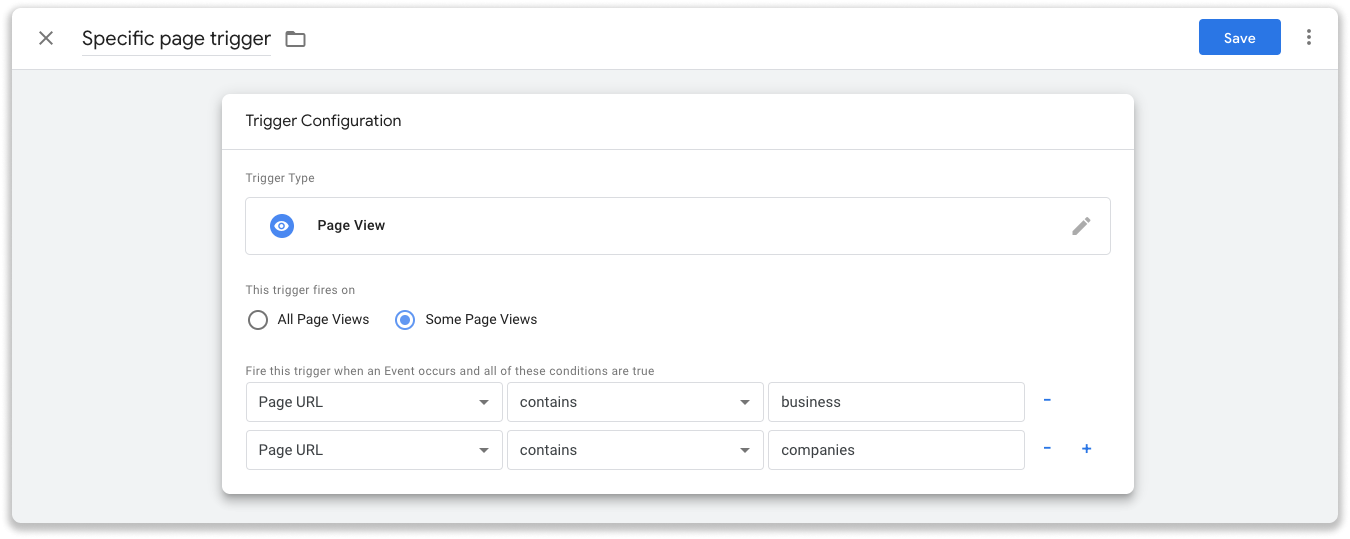 Avoid lazy stuff, such as “All Pages” or “Click – All Elements.” These make a lot of noise and give a lot of false data.
Rather, make triggers very clear in URL paths, button classes, or specific event types. This keeps tracking lean and accurate.
Test regularly before publishing
Make Preview Mode second nature to you instead of an afterthought. Even minor tweaks can break logic or make things fire that would otherwise not fire.
Testing ensures smooth data flow and prevents missed conversions due to trigger misfiring or broken variables.
Use GTM Workspaces and Versions
GTM can be developed safely in draft mode using Workspaces. This way, the change remains hidden until you can confidently hit it live. It has a Version history, so rolling back is only a click away if anything breaks.
This structure gives everyone clarity when working in teams or in fast-moving campaigns. It minimizes mistakes and keeps your container clean and conflict-free.
Document your tag setup
All this sounds like part and parcel of normal life. However, documentation may save from future trade confusion, especially if GTM is handed off to someone else.
Use GTM’s built-in notes or keep a shared spreadsheet to track each tag, its triggers, and the variables it relies on.
Ensure Security & Compliance with Permission Tiers
Secure your GTM account with role-based permissions to limit access. Restrict full control to reduce the risks of unauthorized changes or breaches.
Set clear roles like Viewer, Editor, or Publisher based on job needs. For instance, developers may need edit access, while marketers only need view access for reports. Regularly check permissions to comply with GDPR or CCPA, ensuring a secure and audit-ready setup.
Bonus: Use TagFly to Monitor Google Tag Manager on Shopify
Managing GTM manually works, but climbing to the next stage creates a new risk: GA4, TikTok Pixel, Meta Pixel, and all your custom tags combined. So you need to be better monitored. That’s TagFly’s specialty.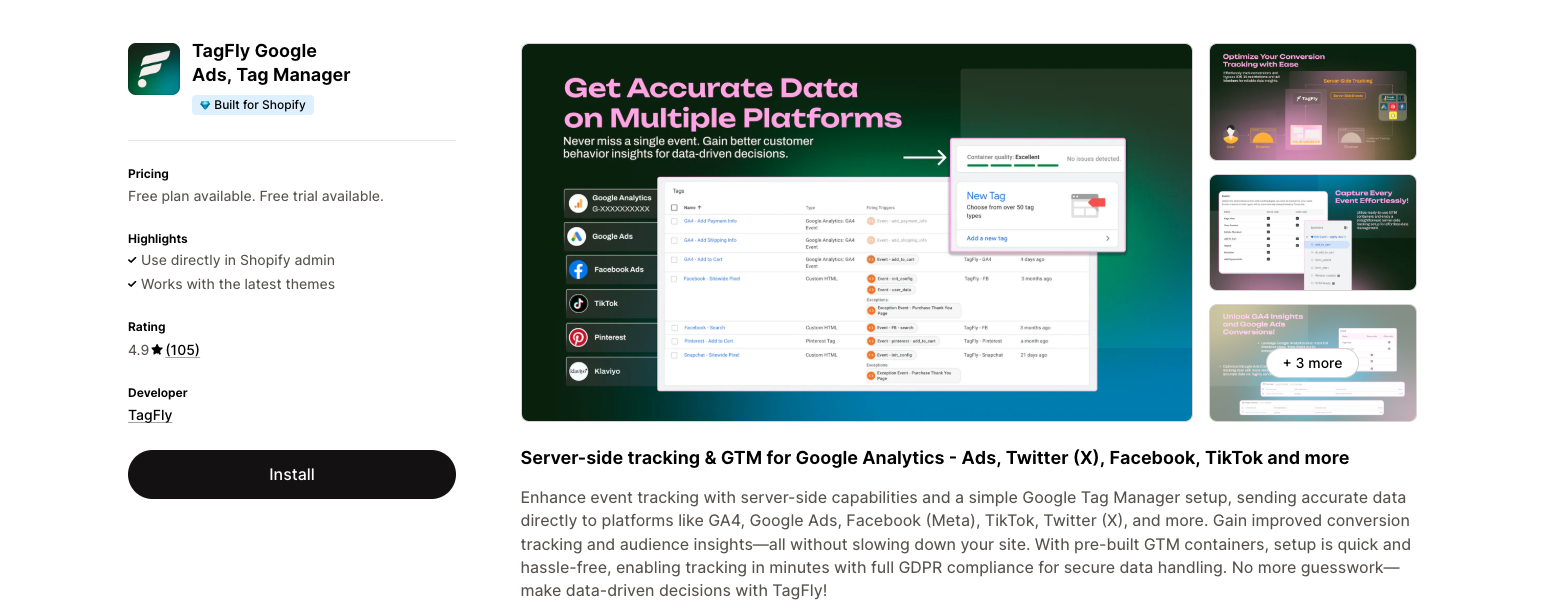
TagFly is a store-native Shopify app built to make GTM tag setup seamless and error-free. Instead of juggling scripts or troubleshooting firing issues, TagFly ensures your GA4, TikTok, and Meta Pixels are properly installed from the start, with no trial and error required.
So why should you go for TagFly?
- Error-free GTM tag setup, even with complex tracking stacks
- Easy to use, fully visual interface, no code or Chrome extension needed
- Built-in support for all major tracking pixels (GA4, TikTok, Meta)
- Dedicated customer support team to help if anything goes off-track
💡 If you want peace of mind knowing your GTM setup is firing correctly at all times, TagFly is the best tool for the job. Stop guessing and start tracking smarter with a solution built just for Shopify.
Conclusion
Keeping your tags in check isn’t just a one-time job; it’s an ongoing part of running a high-performing Shopify store. Whether you’re testing new campaigns, installing third-party tools, or switching themes, it’s essential to regularly check Google Tag Manager to make sure everything still works as expected.
You can use built-in tools like Preview Mode and Tag Assistant, or go further with a Shopify-first monitoring tool like TagFly. It’s time to take control of your tracking stack, without the stress.
Your data deserves better. Don’t let broken tags hold your store back!