If you’re looking to better understand how visitors engage with your Shopify store, Google Tag Manager is an excellent tool. It enables you to effortlessly track and analyze audience behavior, offering valuable insights to enhance your store’s performance. This guide will take you through the step-by-step process of setting up Google Tag Manager on Shopify.
How to Install Google Tag Manager on Shopify?
There are 2 methods of adding GTM in Shopify and that will depend on what works best for you. You can go with the manual way for full control over the setup, or take the easier route using the app to get everything up and running quickly.
#1: Install GTM on Shopify Manually
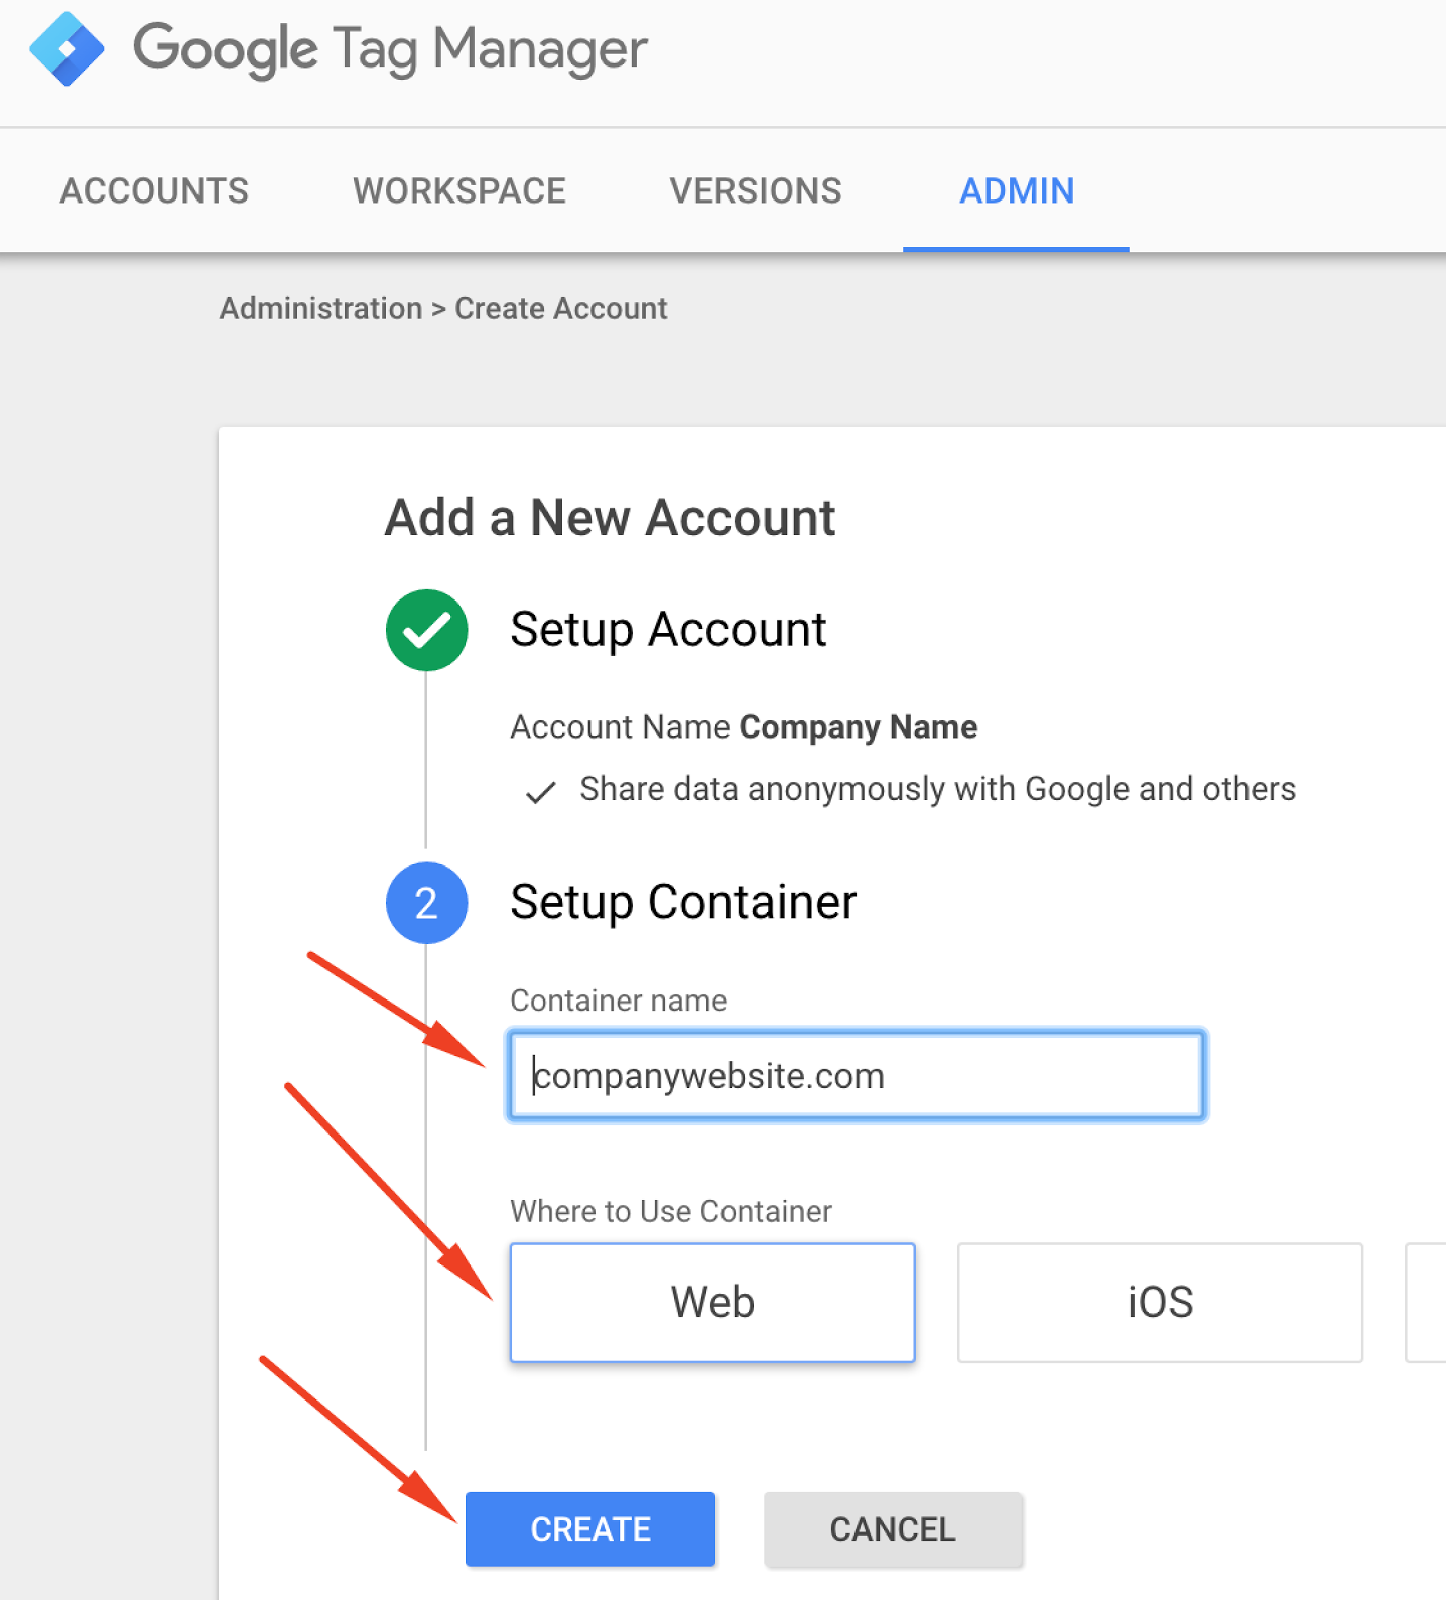
Step 1: Create a Google Tag Manager Account
Visit the Google Tag Manager website.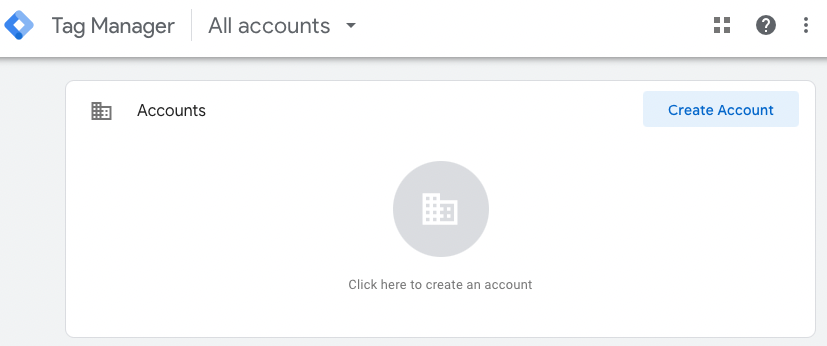
Click Create Account and set up the following:
- Account Name: Enter your business name.
- Container Name: Use your Shopify store URL.
- Target Platform: Select Web.
Accept Google’s terms of service to generate your GTM container code snippets (Header and Body).
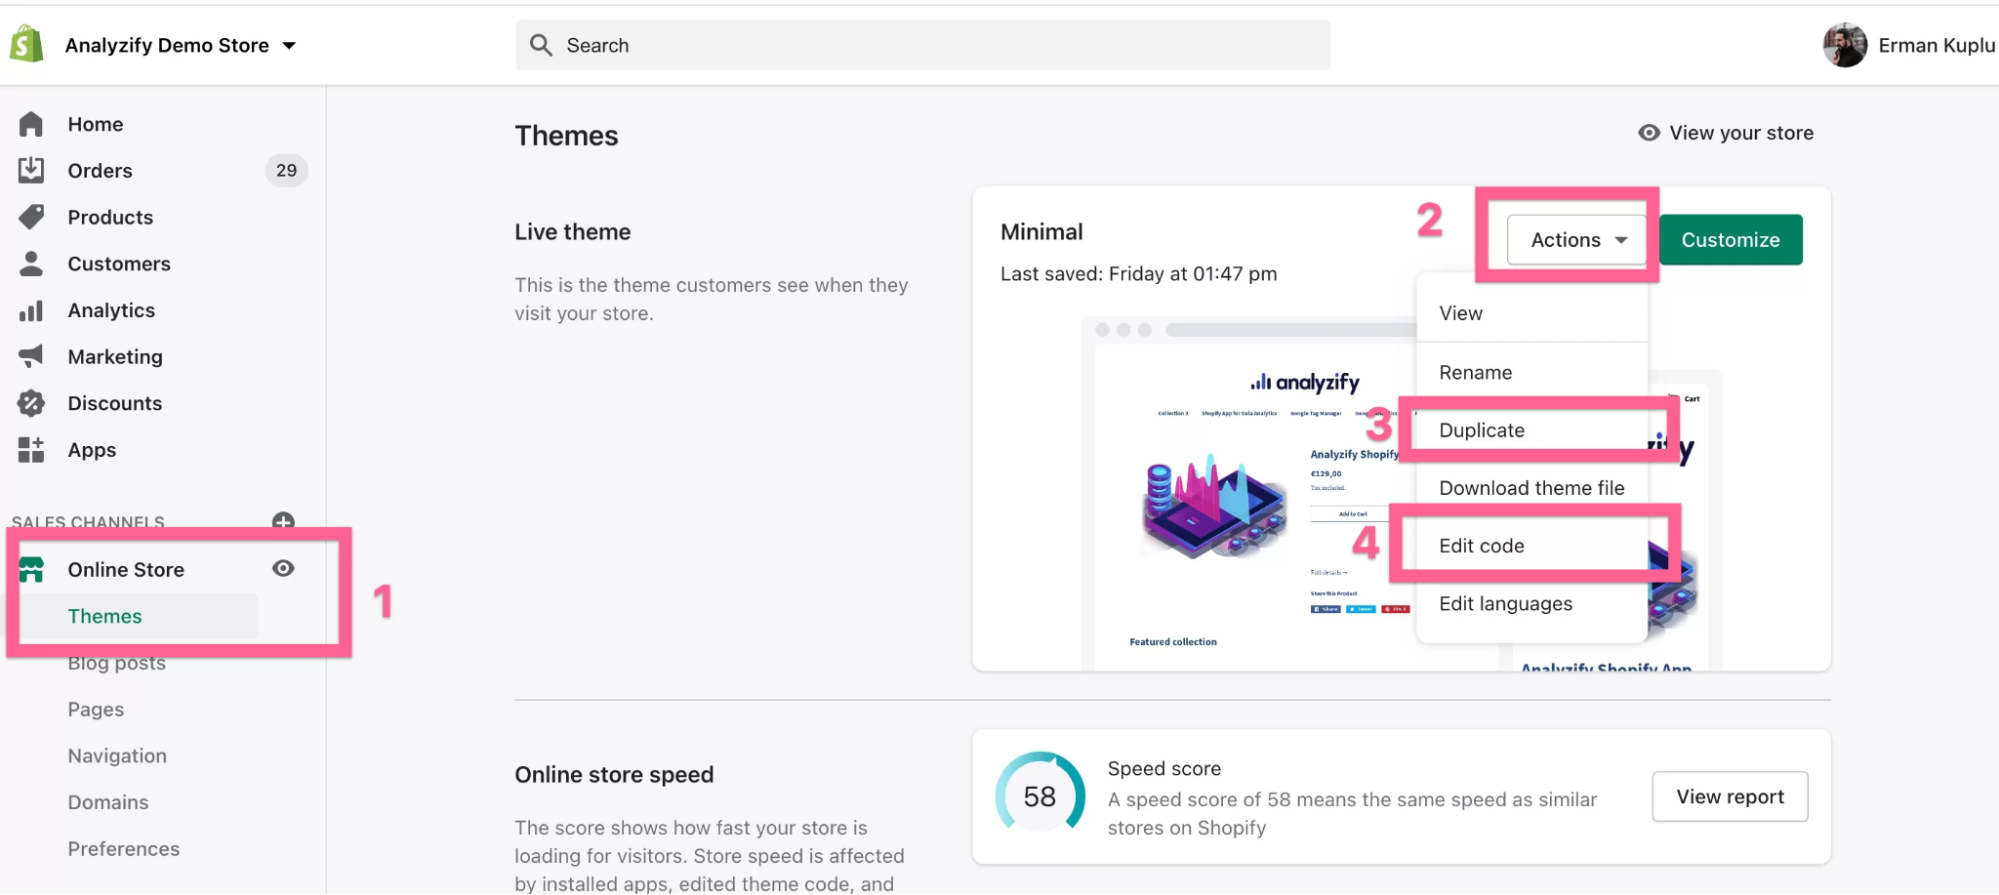
Step 2: Access Shopify Admin and Theme Code
Log in to your Shopify admin dashboard.
Navigate to Online Store > Themes.
Under your current theme, click Actions > Edit Code.
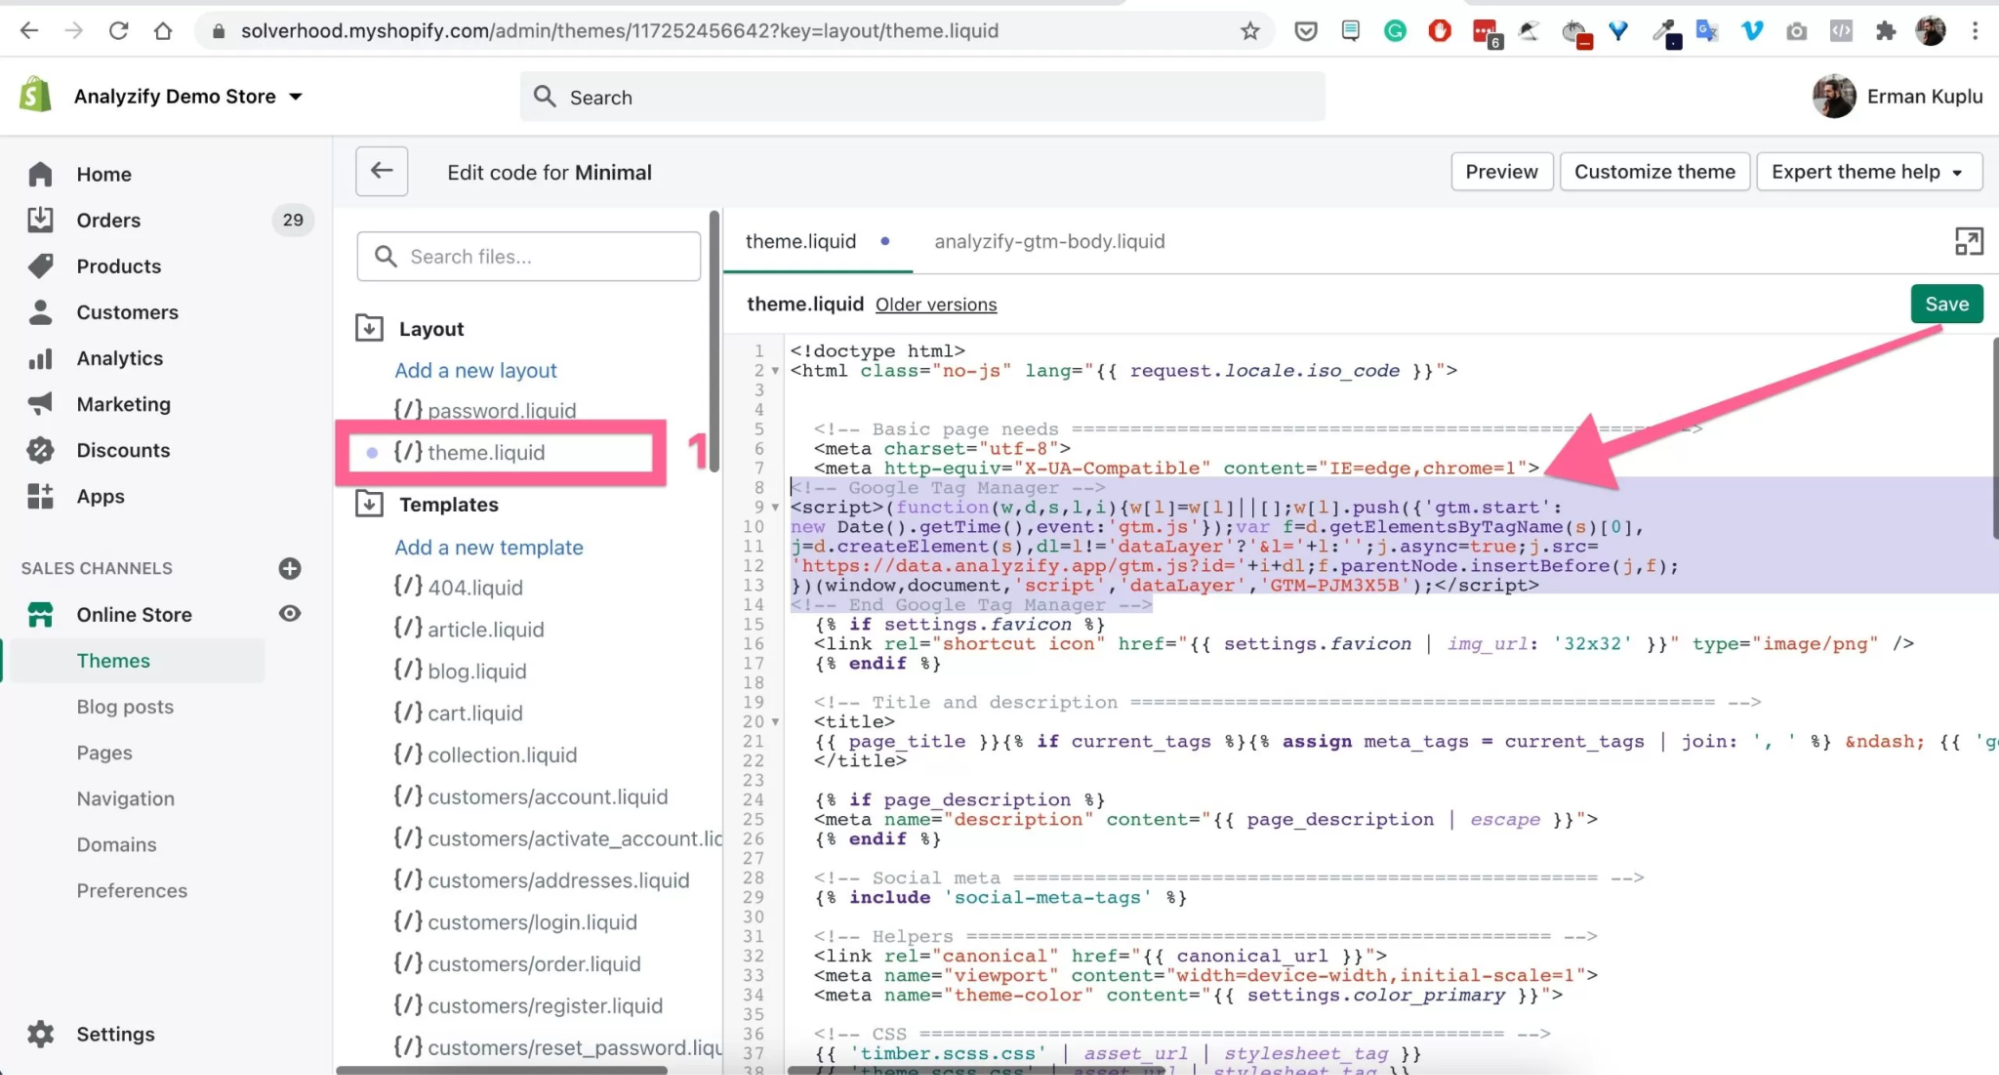
Step 3: Add GTM Code to Your Theme Files
Insert the Header Code:
- Open the theme.liquid file under the Layout section.
- Locate the <head> tag at the top of the file.
- Paste the Header Code snippet from Google Tag Manager right below the <head> tag.
Insert the Body Code:
- Still in the theme.liquid file, locate the <body> tag.
- Paste the Body Code snippet immediately after the <body> tag.
Save your changes to the theme file.
#2: Install GTM on Shopify with a GTM App
If you prefer a faster and easier way to install Google Tag Manager on Shopify, using a GTM integration app is the best option.
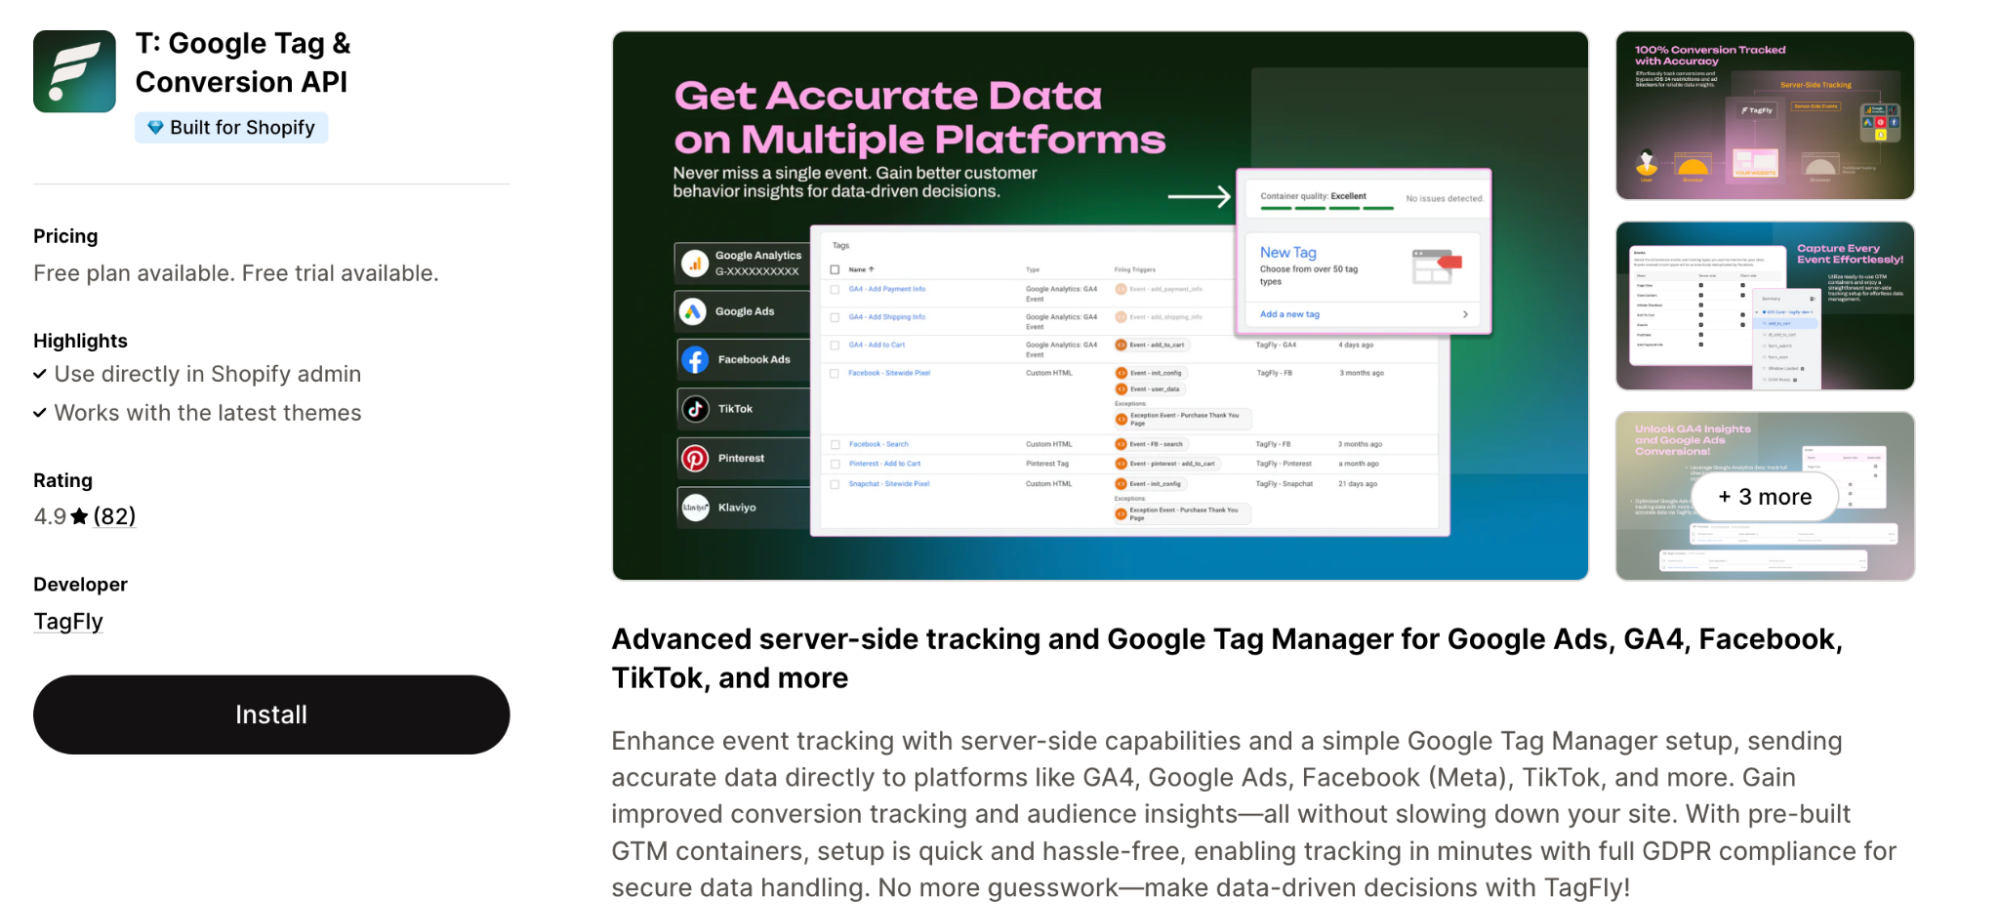
Step 1: Choose a GTM App
Go to the Shopify App Store and search for a GTM integration app like Tagfly to simplify your tracking setup and enhance your store’s analytics.
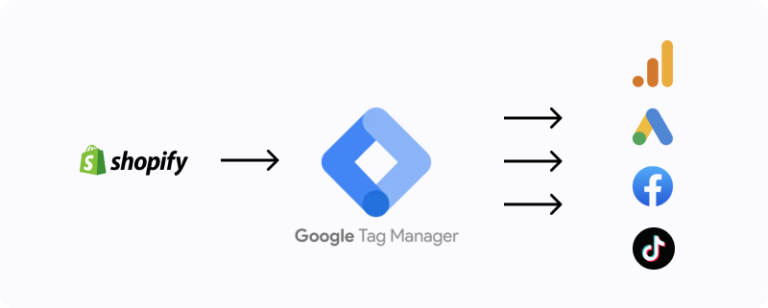
With TagFly, you can quickly install GTM and gain access to essential data layer variables, enabling accurate tracking across major platforms like GA4, Google Ads, Facebook (Meta), TikTok, and more. Say goodbye to complicated manual setups—the app makes it easy to get started with just a few clicks.
Once you’ve installed and configured TagFly, what’s next?
- Effortless event tracking across GA4, Google Ads, Facebook, TikTok, and more—no manual setup needed.
- Server-side tracking ensures precise customer data collection, overcoming iOS limitations.
- Pre-configured GTM containers ready for instant use with GA4, Facebook, Google Ads, and TikTok.
- Simplify multi-platform tracking by managing all pixels and marketing destinations in one place.
- Built-in compliance with major privacy regulations, including GDPR and CCPA, for secure data handling.
Click Add App to install it on your Shopify store.
Step 2: Open the App and Enter GTM Container ID
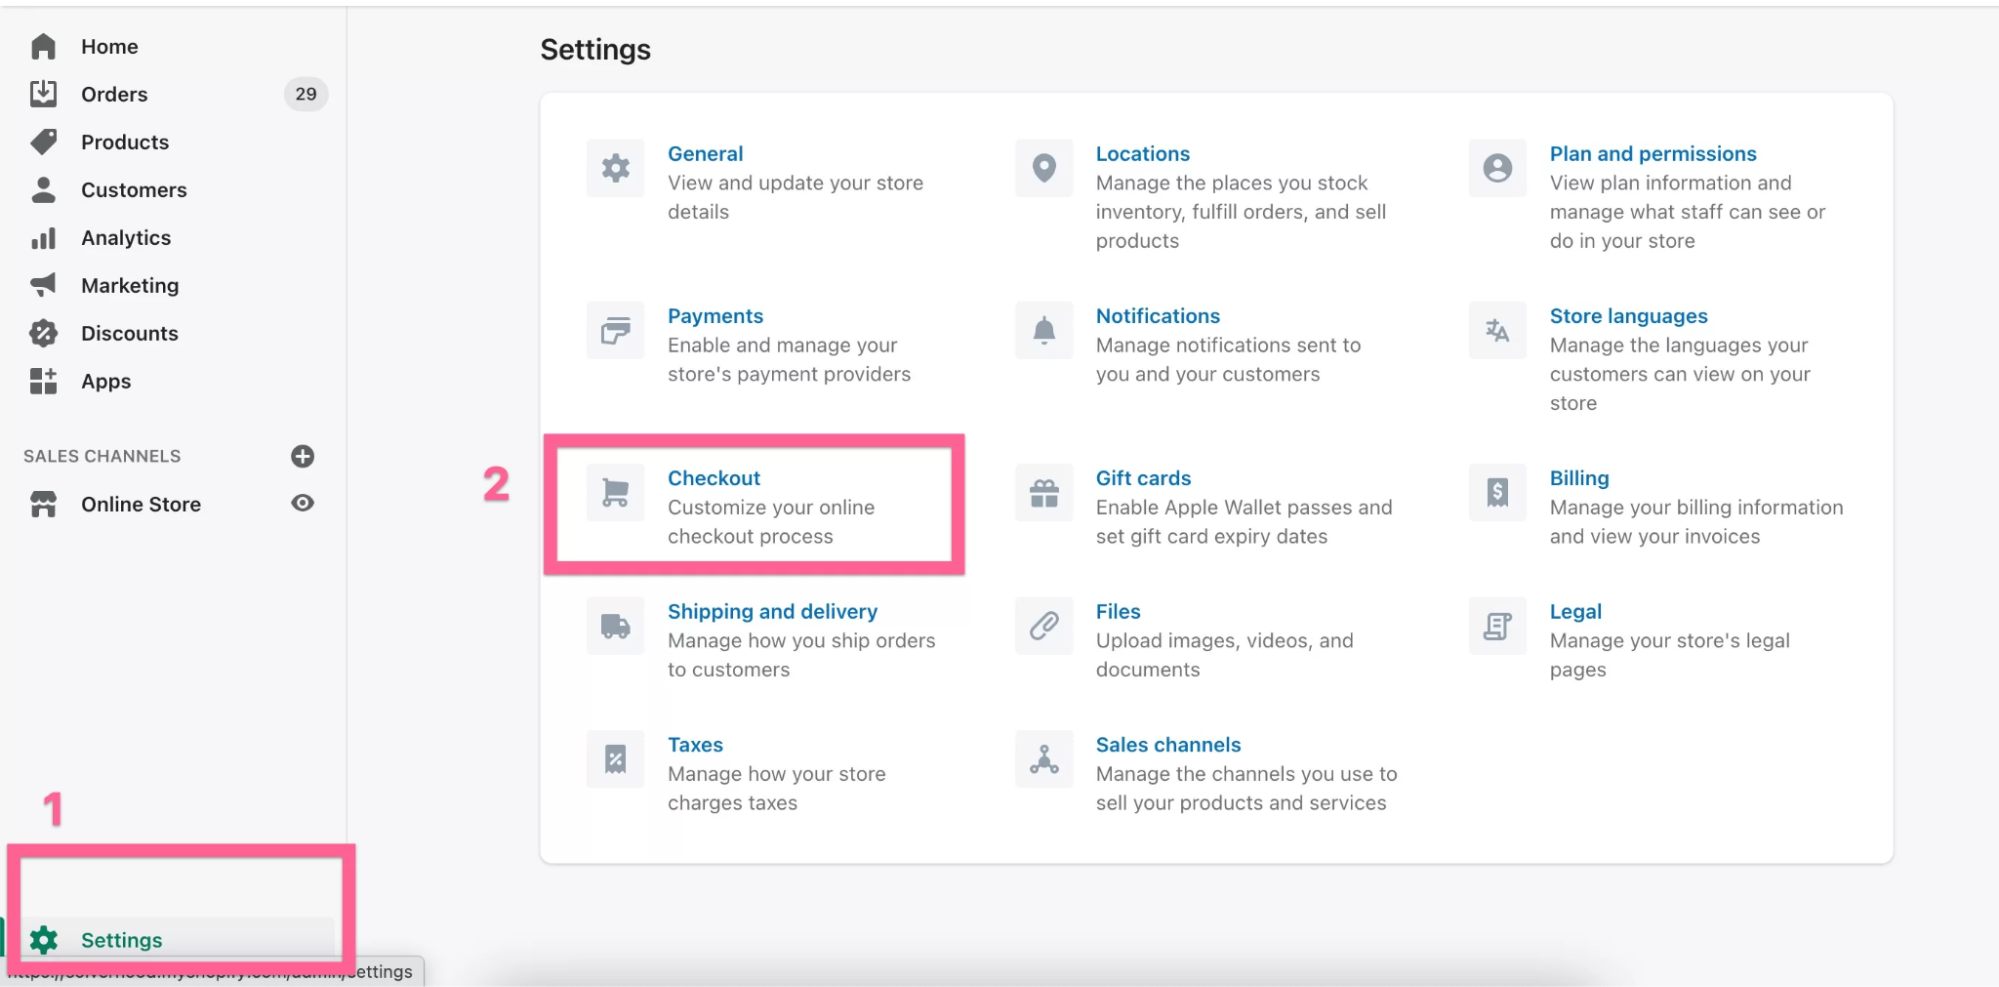
After installation, open the app from your Shopify admin dashboard under Apps.
Find the field to input your GTM Container ID (e.g., GTM-XXXXXX).

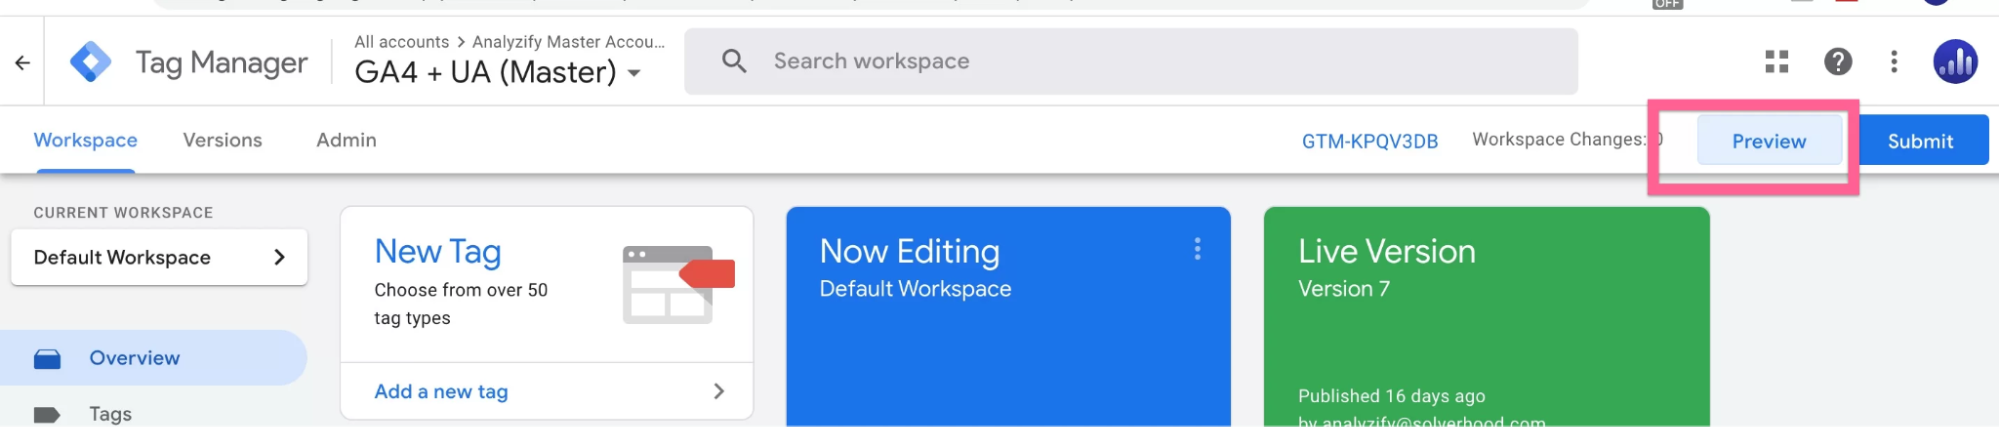
Your GTM Container ID is located in your Google Tag Manager account at the top of the workspace.
Save the changes, and the app will automatically insert the required GTM code snippets into your Shopify theme.
Google Tag Manager Shopify Checkout
It’s important to know that Shopify restricts checkout tracking for stores on Basic and Shopify plans. Full access to the checkout data layer is only available for Shopify Plus users. However, all plans allow tracking of the Thank You Page, which confirms completed orders.
- Log in to your Google Tag Manager account.
- Create a new Page View Trigger to fire on the Thank You page URL. Example: Page URL contains /checkout/thank_you.
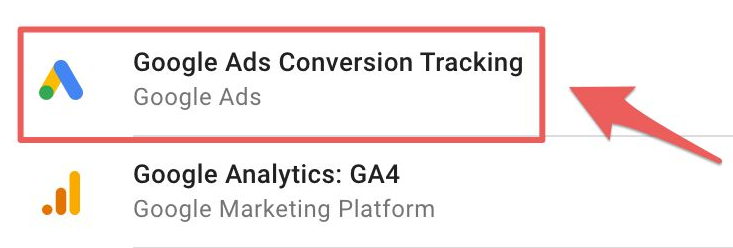
- Attach this trigger to tags like Google Analytics or Google Ads Conversion Tracking to capture order completion data.
For Shopify Plus users, the checkout process includes a Google Tag Manager data layer with details like:
- Order ID
- Total revenue
- Product information (e.g., ID, quantity, price)
How to Verify That Your Google Tag Manager Is Working on Shopify
Step 1: Enable GTM Preview Mode
Click on the Preview button in the top-right corner of your workspace.
Enter your Shopify store URL in the popup and click Connect.
This will open your store in debug mode, with a separate debug panel showing all tags and triggers.
Step 2: Test Key Pages and Actions
Navigate through key pages on your Shopify store, such as the homepage, product pages, and the checkout process (if supported by your Shopify plan).
Perform key actions, such as:
- Viewing a product page.
- Adding a product to the cart.
- Initiating checkout.
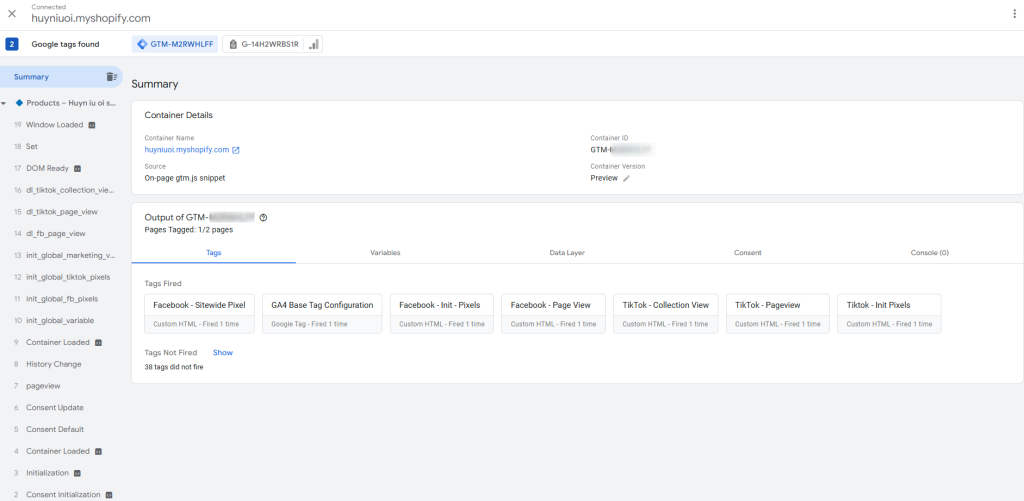
In the debug panel, verify:
- Which tags are firing and when.
- Whether the triggers match your configured actions.
GTM Tags and Triggers for Shopify
1. Essential GTM Tags for Shopify
Google Analytics 4 (GA4) Tag
- Tracks page views, user interactions, and eCommerce events like purchases.
- Use this tag to monitor your Shopify store’s performance and customer behavior.
Google Ads Conversion Tracking Tag
- Tracks conversions such as purchases, add-to-cart events, or signups.
- Helps you measure the effectiveness of your Google Ads campaigns.
- Remarketing Tag (Google Ads or Facebook Pixel)
- Collects data to create remarketing audiences and deliver personalized ads to users who visited your store.
Custom HTML/JavaScript Tags
Allows for advanced tracking or integrations with third-party platforms. For example, affiliate tracking or chat tools.
2. Key GTM Triggers for Shopify
1. Page View Trigger
Fires on all pages to track user visits and send data to Google Analytics.
Example: Send a page view event to Google Analytics or Google Ads.
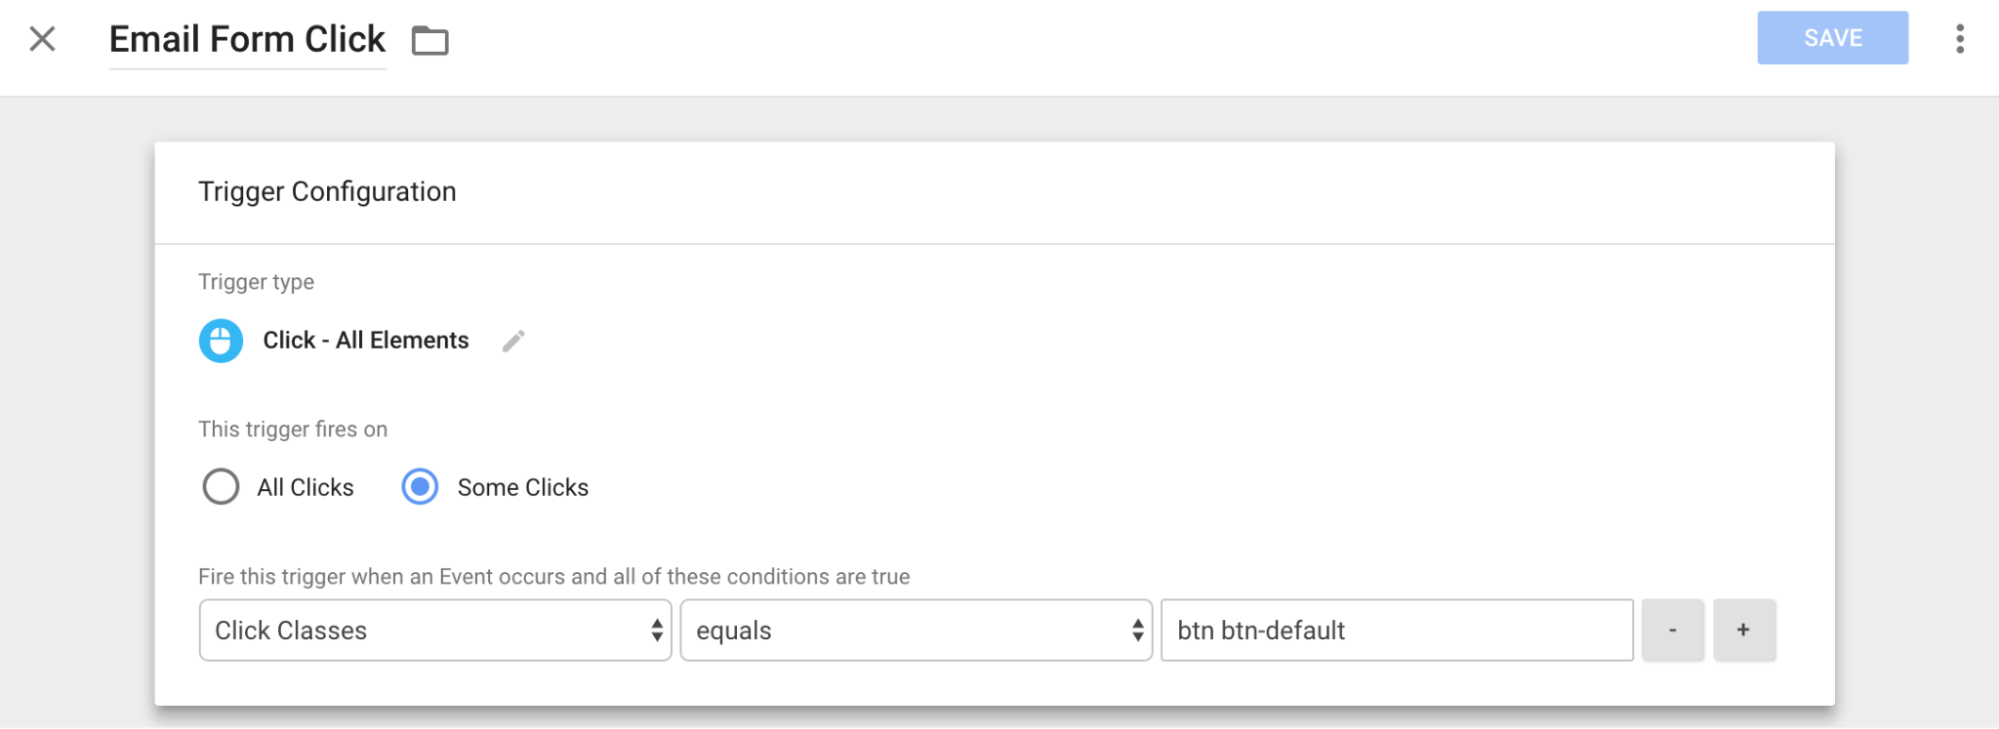
2. Click Trigger
Tracks when users click on specific elements, such as “Add to Cart” or “Buy Now” buttons.
Example: Use this to measure click-through rates for CTAs.
3. Form Submission Trigger
Fires when a user completes a form, such as a contact form or email signup.
4. Transaction Trigger (Thank You Page)
Tracks purchases by firing on the “Order Confirmation” or “Thank You” page after checkout.
Example: Send purchase details like revenue and products purchased to Google Analytics or Google Ads.
5. Custom Event Trigger
Record special, single events in your store, such as video plays or click events on promotional banners.
Manual vs. App-based Installations: Which One is Best for Google Tag Manager on Shopify?
Manually installing Google Tag Manager (GTM) on Shopify can be a long, complex, and often error-prone job. Besides the technical knowledge required, it necessitates ongoing maintenance, which makes it quite difficult for most store owners.
Manual installation generally results in unwanted tracking, taking time on implementation, and possible conflict with Shopify updates, all of which generally affect marketing performance and data accuracy.
A much cooler and more efficient way is by going through a Shopify GTM app like TagFly. No fuss in manual setups; the app uses ready GTM containers and offers on-the-fly event tracking, so businesses only need to integrate it with GA4, Google Ads, Facebook (Meta), TikTok, and the like.
Most importantly, it does not require one to have coding skills. The application has server-side tracking for better data accuracy and thus, proper audience insights and conversion tracking, all while keeping the integrity of website performance and privacy laws such as GDPR. Thus, application-based solutions have been time-saving, error-reducing, and highly empowering to businesses in making data-driven decisions at the flow.
Wrap-Up
Setting up Google Tag Manager on Shopify stores is probably the best way to start getting much better tracking and data insights from your store. Whether you are a DIY person who wants to have everything customized or whether you want a quick setup using an app, GTM enables tracking customers and optimizing marketing actions. With the right set up, your Shopify store performance is taken to a new level!