The Google Tag Manager Data Layer might seem like a complex, developer-only concept, but with the right approach, anyone can get a grip on it. It may take some time to know the connection between everything, but once this connection is established, everything will fall in place for you, providing a better view of how GTM works.
This blog attempts to demystify GTM for non-developers so that they can take hold of tracking implementations in Google Analytics, Google Ads, etc.
What is Google Tag Manager Data Layer?
The Google Tag Manager Data Layer is a JavaScript object designed to hold key data for webpages and push it to GTM. It helps organize user interactions and page details in a structured way.
Instead of relying on HTML elements (DOM), which can change and be unreliable, the Data Layer stores data in a clean, standardized format. This allows marketers and developers to easily track events, conversions, and user behavior with greater accuracy and efficiency.
Check the official documents about Data Layer from Google here.
How Does GTM Data Layer Work?
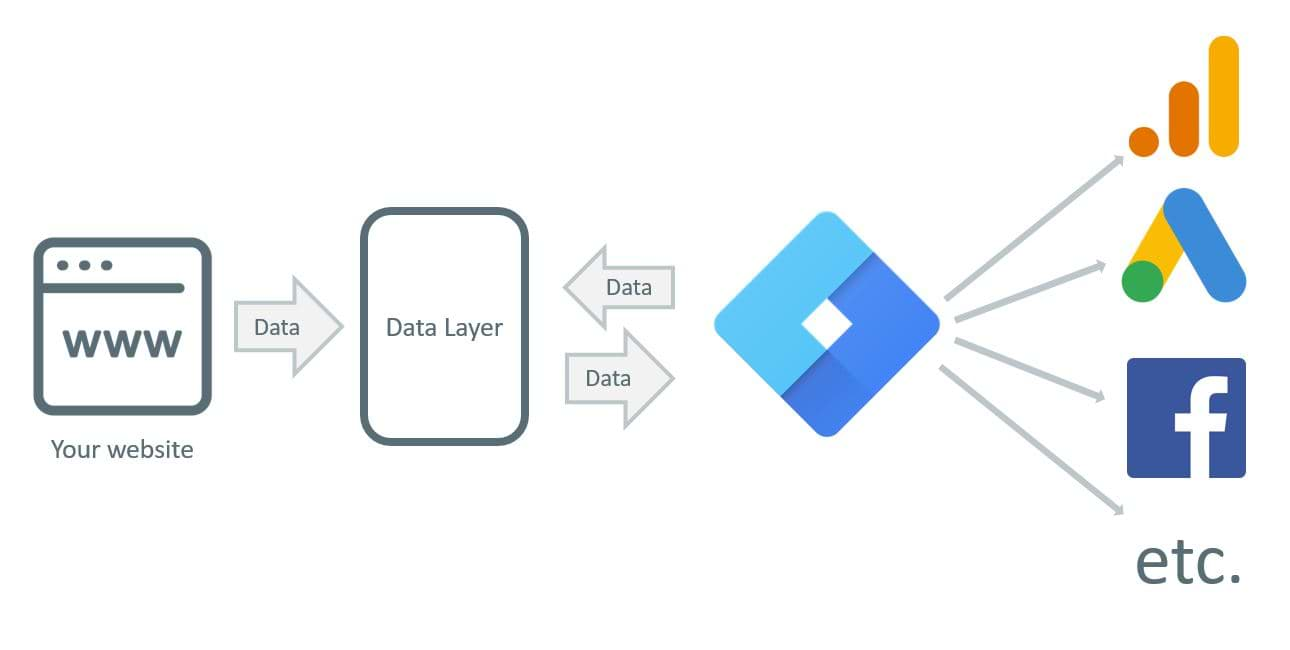
A Google Tag Manager Data Layer is a JavaScript array that temporarily stores website data for GTM to use in tags, triggers, and variables. Later, other tools like Google Analytics and Meta Pixel can also access this data.
Think of the Data Layer as a hidden bucket on your website, filled with data balls (e.g., user ID, purchase details, page category). GTM pulls information from this bucket to track user interactions and trigger events.
For example, a click event can act as a trigger in GTM, or a Form ID can help A/B test which forms generate more leads. This data is then sent to GA4 for reporting.
Data can be added to the Data Layer by developers, third-party plugins, or even GTM itself.
Data Layer Declaration and dataLayer.push
Before making use of the Google Tag Manager Data Layer, it needs to be correctly initialized on your website. This will make sure that all tracking data will be stored neatly and it will be found by GTM.
- Declaring the Data Layer
The first step is to define the Data Layer as a global JavaScript array. Usually, it is placed in the head tag of your website before any tracking codes:
window.dataLayer = window.dataLayer || [];
- Pushing Data to the Data Layer
When declared, information can be pushed dynamically through dataLayer.push(). With this method, new values can be appended without overwriting the existing ones. An example of this process:
window.dataLayer.push({

    'event': 'addToCart',

    'productID': 'P12345',

    'productName': 'Wireless Headphones',

    'price': 99.99

});
Expert notes:
- Do not overwrite the Data Layer: Use dataLayer.push() and never redefine window.dataLayer; otherwise, the information will be lost.
- Follow a structured approach: Use objects to organize related data, instead of pushing separate things one after the other.
- Push data at the right time: Make sure when “purchase” is triggered, the transaction is done.
Data Layer Use Cases
The Data Layer is not just a big storage, but also one of the most important parts that respects the way tracking data is organized and structured here. Some practical examples include:
- Ecommerce Tracking
For online shops, the Data Layer works to capture important transaction information, so purchases, cart adds, and product views are tracked correctly.
window.dataLayer.push({

    'event': 'purchase',

    'transactionID': 'T98765',

    'totalValue': 150.00,

    'currency': 'USD',

    'items': [

        {'id': 'P001', 'name': 'Smartphone'},

        {'id': 'P002', 'name': 'Charger'}

    ]

});
- Form Submission Tracking
Tracking form submits is valuable to measure everything around lead generation efforts.
window.dataLayer.push({

    'event': 'formSubmission',

    'formID': 'newsletter-signup',

    'userEmail': '[email protected]'

});
- Enhancing Advertising Campaigns
Platforms such as Google Ads can use Data Layer values to remarket and audience segment.
window.dataLayer.push({

    'event': 'userRegistration',

    'userID': 'U45678',

    'membershipLevel': 'Gold'

});
How to Set Up the Data Layer in Google Tag Manager?
Step 1: Access Google Tag Manager
Login into your Google Tag Manager account and click on your container for your website. Click on “Variables” on the left-hand menu to open the variables section.
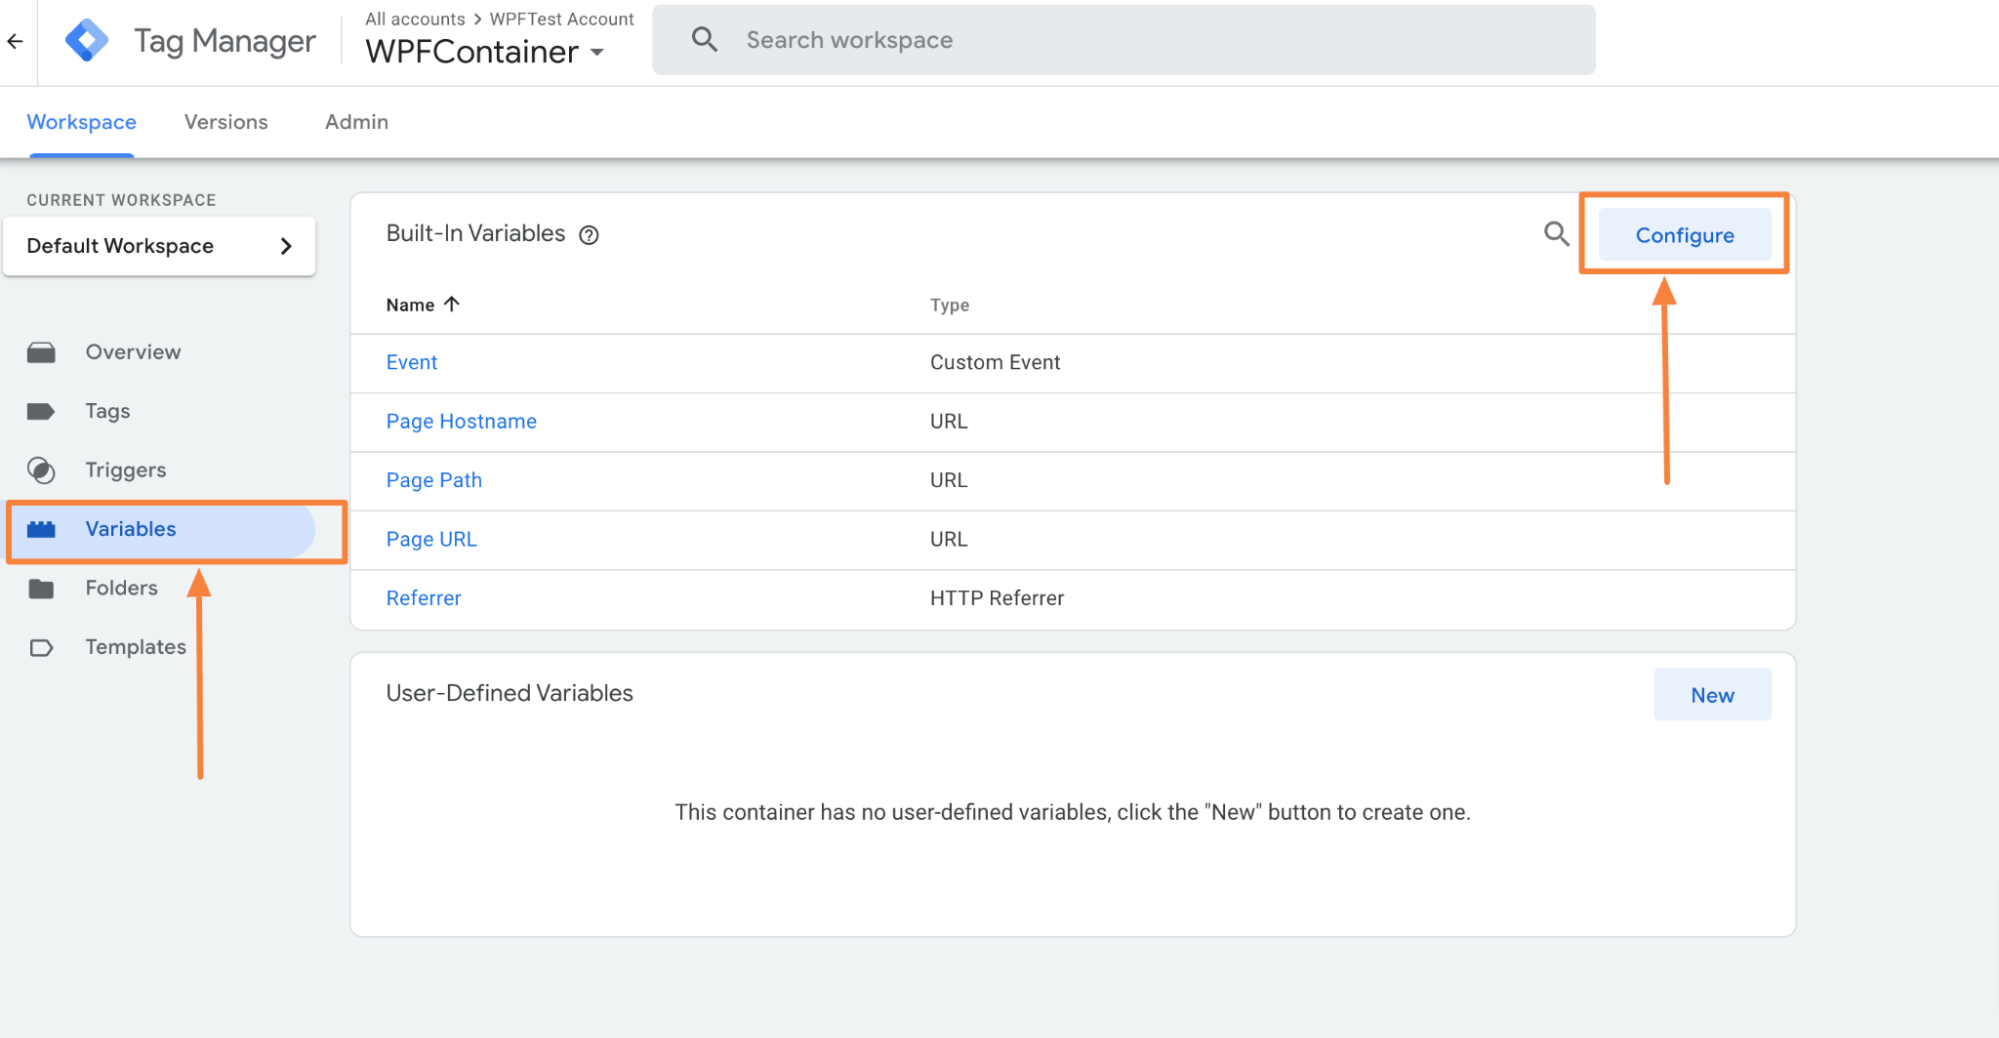
Scroll down to the User-Defined Variables section and click on “Configure”. This will open a new variable configuration window.
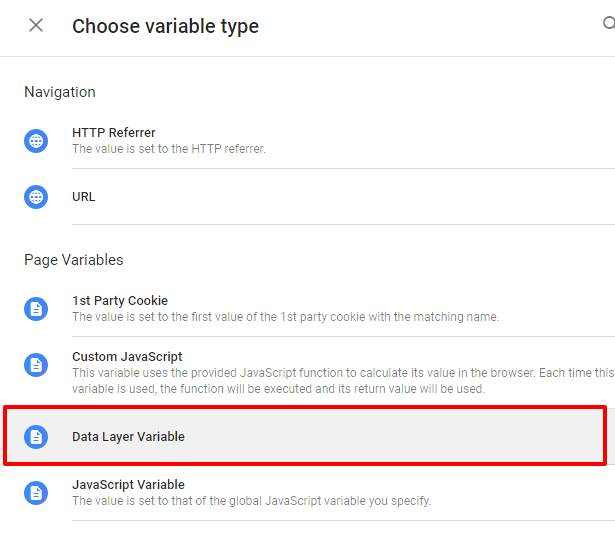
Step 2: Choose GTM Data Layer Variable Type
Click on the variable configuration panel, and from the list of available variable types, select “Data Layer Variable”. This tells GTM that the variable will pull information directly from the Data Layer.
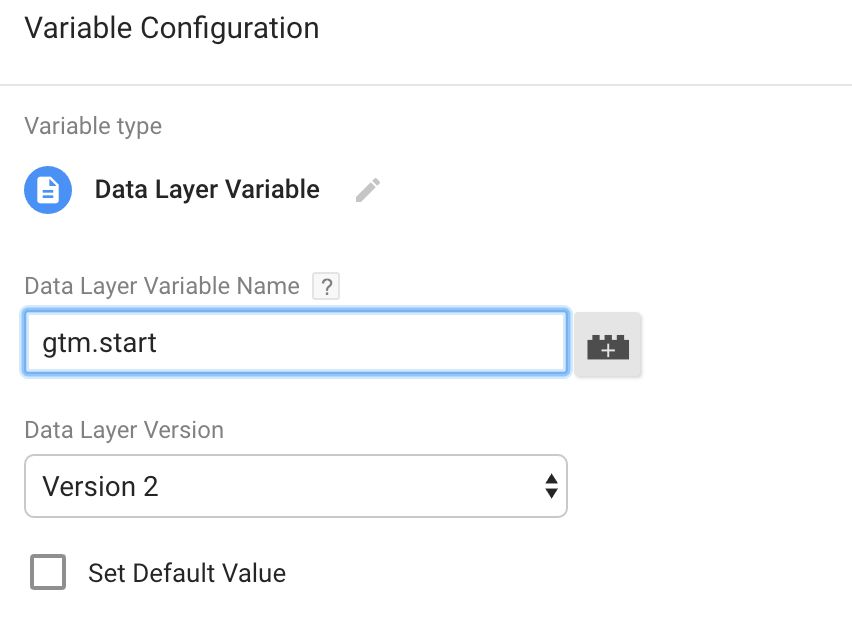
Step 3: Define the Variable Name and Key
- Use descriptive names in the Variable Name field such as “DLV – Product’s Price” or “DLV – User ID” to reflect what data it represents.
- On the Data Layer Variable Name field, either the exact key that matches the data as stored in the Data Layer should be entered. Suppose on your website, the identifier of user’s ID is stored under “userID”; enter that as the variable name, “userID”.
- In case the data to be retrieved is nested inside objects, you have to use dot notation (e.g., “user.membership”) so as to retrieve a specific value.
Step 4: Save and Test Your Variable
Click “Save” to store the variable. To ensure it’s working correctly:
- Open Google Tag Manager’s Preview Mode and interact with your website.
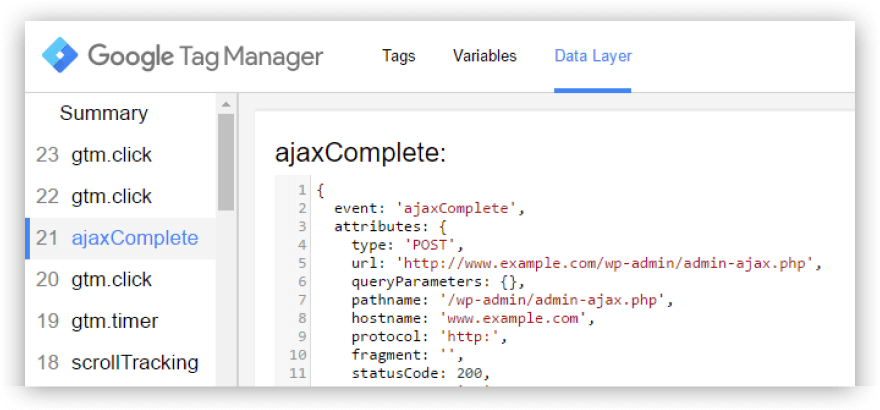
- In the GTM Debug Console, check whether the Data Layer is capturing and passing the expected data.
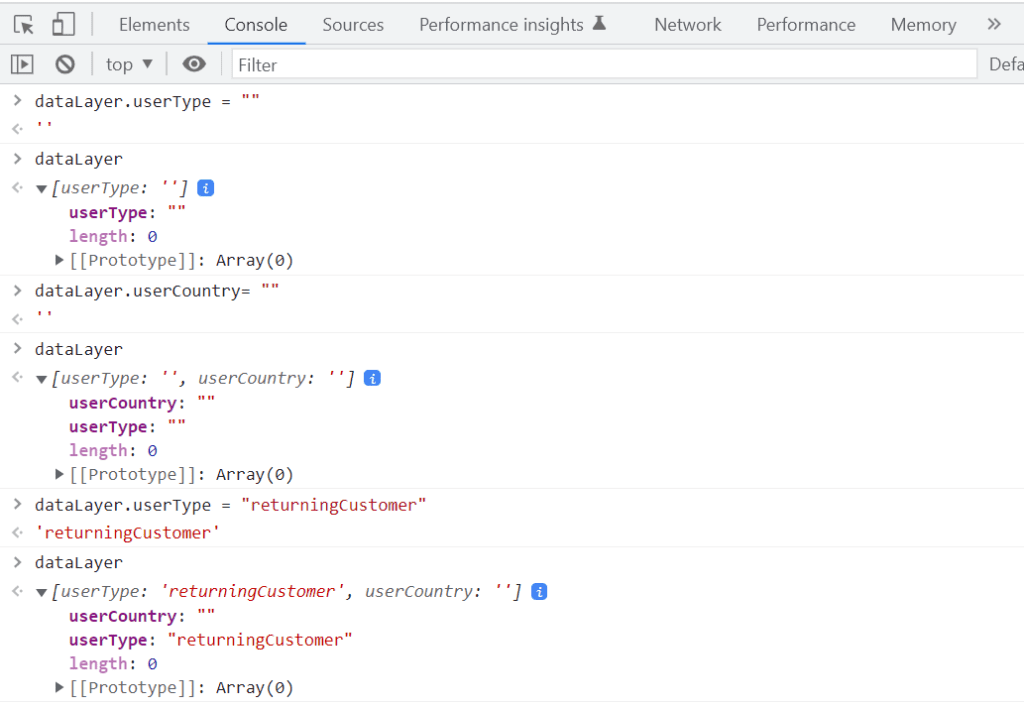
- Use the browser console (dataLayer command) to inspect its contents and confirm the variable is retrieving the correct values.
TagFly tips for GTM Data Layer setup:
- Use a consistent naming convention: Prefix your Data Layer variables with “DLV” (e.g., DLV – Page Category) for better organization.
- Use dot notation for nested values: If data is inside objects, separate layers with a dot (e.g., “user.membership” to retrieve “gold” from { user: { membership: “gold” } }).
- Work with arrays correctly: For multiple values, use array indexing (e.g., products.0.name for the first product in a list).
How to Use the Data Layer in GTM?
Once your Data Layer has been configured in Google Tag Manager, the next step is to leverage it for tracking and analysis. Here are some suggestions to maximize its use.
1. Tracking
The data layer serves, among other things, to set up tracking for significant user interactions and page details. Instead of relying on HTML elements, which can change frequently, the Data Layer stores structured data that GTM can access reliably.
Step 1: Push Data to the Data Layer
First, your website’s developers need to push data into the Data Layer.
For instance, when a user adds a product to the cart, the website code would contain:
window.dataLayer.push({

    'event': 'addToCart',

    'productID': 'P12345',

    'productName': 'Wireless Headphones',

    'price': 99.99

});
This indicates that upon the addition of an item to the cart, the Data Layer holds information such as product ID, name, and price.
Step 2: Create a Data Layer Variable in GTM
Step 3: Use the Variable in Tags
Once the variable is created, you can use it in Google Analytics, Facebook Pixel, or other tools.
Now, Google Analytics will receive structured event data every time a user adds an item to their cart!
2. Setting Triggers
Triggers in GTM tell when a tag should fire. Instead of relying on unreliable click events, you can set up triggers based on Data Layer values.
Step 1: Identify the Data Layer Event
First, make sure the event exists in the Data Layer. Example:
window.dataLayer.push({

    'event': 'purchase',

    'orderID': 'T98765',

    'totalValue': 150.00

});
This event occurs when a user completes a purchase.
Step 2: Create a Trigger in GTM
Step 3: Add Conditions (Optional)
If you only want the tag to fire for orders over $100, add a condition:
- Variable: DLV – totalValue
- Condition: greater than 100
Now, this trigger will only fire when a user completes a purchase of more than $100.
3. Sending Data to Other Tools
The Data Layer also helps send structured data to marketing and analytics platforms like Google Analytics, Google Ads, and Facebook Pixel.
Step 1: Push Data to the Data Layer
When a user submits a form, the website can push this data:
window.dataLayer.push({

    'event': 'purchase',

    'orderID': 'T98765',

    'totalValue': 150.00

});
This event captures the form type and the user’s email.
Step 2: Create Data Layer Variables in GTM
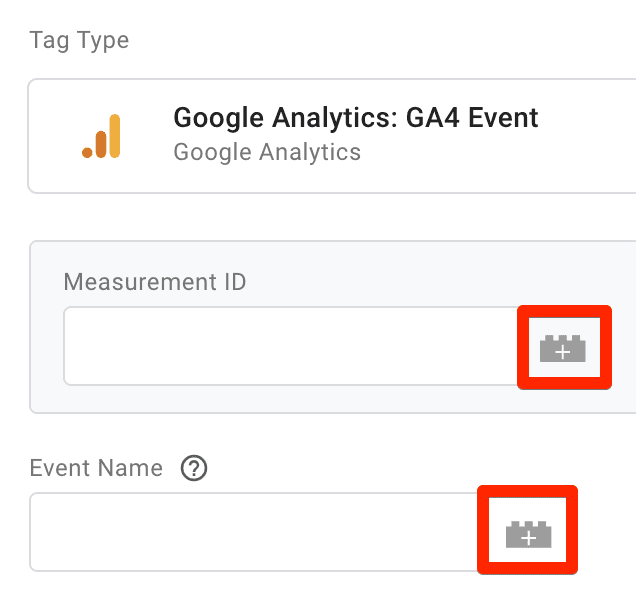
Step 3: Create a GA4 Event Tag
So, every time a user submits a form, GA4 receives structured data about the form type and the user’s email.
What are the Best Practices for Managing the Data Layer?
#1 Use Clear and Consistent Naming
- Instead of generic names like value, use something specific like productPrice or userID.
- Use either camelCase (productPrice) or snake_case (product_price), but don’t mix styles.
- Follow a standard format:
| Prefix | Usage | Example |
| DLV – | For Data Layer Variables | DLV – transactionID |
| event – | For events | event – purchase |
#2 Keep Your Data Layer Organized
A clean and structured Data Layer helps GTM efficiently retrieve data for triggers, tags, and variables. Poorly structured data can lead to tracking errors and debugging difficulties.
- Group related information together: Instead of creating multiple variables, use nested objects:
window.dataLayer.push({

    'event': 'purchase',

    'ecommerce': {

        'transaction_id': 'T12345',

        'value': 99.99,

        'currency': 'USD',

        'items': [

            {'id': 'P001', 'name': 'Laptop'},

            {'id': 'P002', 'name': 'Mouse'}

        ]

    }

});
- Keep it consistent: If your site uses userID on one page, don’t use id_user on another page.
- Only store necessary data: Avoid pushing too much information, as it can slow down tracking and make debugging harder.
#3. Avoid Overwriting Existing Data
If you need to add new data to the Data Layer, always push it instead of overwriting existing values.
Incorrect (Overwrites previous data):
window.dataLayer = [{

    'event': 'pageView',

    'userID': '12345'

}];
Correct:
window.dataLayer.push({

    'event': 'pageView',

    'userID': '12345'

});
Always use dataLayer.push() to keep previous data intact.
#4. Keep the Data Layer Lightweight
A bloated Data Layer can slow down page performance and cause tracking delays. To keep it optimized:
- Only push necessary data: Avoid adding redundant or excessive values.
- Trigger updates only when needed: Instead of firing Data Layer updates frequently, only push changes when an important event occurs (e.g., a user submits a form or completes a purchase).
- Check Data Layer performance regularly: If tracking slows down, consider optimizing your setup by reducing unnecessary variables.
#5. Document Your Data Layer Implementation
Proper documentation ensures that your GTM setup remains scalable, understandable, and easy to maintain. Without documentation, tracking setups can become disorganized and difficult to troubleshoot.
- Keep a list of all Data Layer events: Document events like purchase, addToCart, formSubmission, and their expected data structure.
- Define all Data Layer Variables: List each variable, its purpose, and where it’s used in GTM.
- Provide guidelines on naming conventions: Ensure that all developers and marketers follow the same structure for consistency.
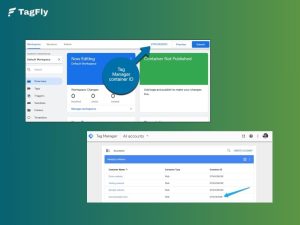
💡Instead of handling complex setups yourself, try TagFly, a smart app that automates GTM tracking and pushes key data into the data layer for accurate, hassle-free event tracking on your Shopify store.
![]()
It bypasses iOS limits and ad blockers with server-side tracking for accurate data and includes pre-set GTM containers for GA4, Google Ads, Facebook, and TikTok Pixels.
Final words
To the casual observer, the understanding of Google Tag Manager Data Layer can appear a bit frightening. However, once well understood, it becomes a powerful means of tracking user interactions and ensuring data integrity. So begin to implement these best practices to give you an efficient tracking mechanism, while you learn more about your audience!