Facebook Pixel and Google Tag Manager work better together, giving you cleaner data and smarter ad tracking. If you’re missing key events or struggling with setup, it’s time to streamline.
| What you’ll learn in this guide: ● Step-by-step methods to install Facebook Pixel using GTM ● How to track standard, custom, and URL-based conversion events ● Best practices to keep your Meta Pixel setup clean and efficient ● Common GTM mistakes and how to avoid tracking errors |
What Is Facebook Pixel and Why Use It?
Facebook Pixel (now called Meta Pixel) is a small piece of tracking code that you add to your website. It collects data about user actions, like viewing pages, adding items to cart, or completing purchases.
With this data, you can:
- Measure the performance of your Facebook ads
- Optimize campaigns based on real user behavior
- Build custom audiences for remarketing
Used correctly, Pixel does more than just track, it helps you optimize the entire customer journey from ad click to conversion.
Why Use Facebook Pixel and Google Tag Manager Together?
Combining Facebook Pixel and Google Tag Manager gives you more control, cleaner data, and easier tag management, without touching your site’s code.
Centralized Tag Management
Located right within GTM are all your tracking scripts, so adding, removing, or updating a tag doesn’t actually require editing your site’s code anymore. Your entire analytics stack, the Facebook Pixel included nestled neatly into one container.
Besides, having a single GTM container reduces the likelihood of script conflicts, expedites deployment speed, and ensures that tags can be confidently handled by non-developers.
Improved Event Accuracy & Testing
When triggered through GTM, Facebook Pixel events can fire precisely at key user actions such as clicking buttons, submitting forms, scroll depth, and others. Precise triggers lead to cleaner data and better ad optimisation.
Also, the built-in Preview and Debug mode within GTM allows you to see which events fire and why, letting you identify duplicates or missed conversions before they drain your budget.
Scalability and Speed for Growing Stores
Once your catalog or campaign mix grows, maintaining these hard-coded scripts manually becomes impossible. Bulk editing, version control, and workspaces let GTM apply pixel changes to multiple sites-within just a few minutes.
In turn, this agility will allow for quicker promo launches, facilitator iteration on new funnels, and keep Facebook ads’ performance affected.
Setting Up Facebook Pixel with Google Tag Manager Methods
There are two main methods to set up Facebook Pixel using Google Tag Manager. The best one for you depends on your technical comfort level and tracking needs.
Method 1: Using Facebook Pixel Template from GTM’s Community Template Gallery (Manual)
This is the easiest and most beginner-friendly method. You don’t need to touch any code — just paste your Pixel ID and choose the trigger.
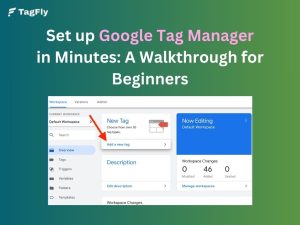
Step 1: Add a New Tag in GTM
- Log into Google Tag Manager: https://tagmanager.google.com/
- In your workspace > Overview > Click Add a new tag
- Click Tag Configuration > Select “Discover more tag types in the Community Template Gallery”
Step 2: Install the Meta Pixel Template
- Search for “Facebook Pixel” or “Meta Pixel”
- Click Add to workspace > Then click Add
Step 3: Configure the Tag
- Paste your Facebook Pixel ID (you can find it in Meta Events Manager)
- Choose PageView as the event type (you can set up other events later)
- You can add multiple Pixel IDs if needed
Step 4: Add a Trigger
Click Triggering > Choose All Pages
Step 5: Save & Publish
- Name your tag (e.g., “Facebook Pixel – PageView”)
- Click Submit
Method 2: Manual Setup Using Custom HTML Tag
This method gives you more control. You paste the raw Pixel code from Meta into a custom HTML tag.
Step 1: Copy Pixel Code from Meta
- Go to Events Manager > Select your Pixel
- Click Add Events > Choose From a New Website
- Select Install code manually > Copy the Pixel base code
Step 2: Create a Custom HTML Tag
- In GTM, click Add a new tag
- Choose Tag Configuration > Select Custom HTML
- Paste your Pixel code into the HTML box
Step 3: Add a Trigger
Select All Pages as the trigger.
Step 4: Save & Publish
- Name the tag (e.g., “FB Pixel – HTML”)
- Click Submit
So, what are the pros and cons of each setup method?
| Feature | Method 1: GTM Template | Method 2: Custom HTML Tag |
|---|---|---|
| Ease of setup | ⭐⭐⭐⭐⭐ Easy for beginners | ⭐⭐ Requires technical skills |
| Coding required | ❌ None | ✅ Yes – need to copy/paste Pixel code |
| Flexibility | Moderate – limited to what the template allows | High – full control over Pixel events and parameters |
| Custom event tracking | Limited customization | Supports advanced custom events |
| Conversion API support | ❌ Must be configured separately | ✅ Can be manually integrated |
| Best for | Simple setups, beginners | Developers or marketers needing full flexibility |
Conclusion:
If you just need basic tracking, method 1 works great. But for more control and advanced use cases, method 2 is the better fit.
👉 However, if you’re looking for the fastest and most complete setup, especially for Shopify, method 3 with TagFly offers a no-code, all-in-one solution for both Pixel and server-side tracking.
Method 3: Shopify Pixel Tracking Made Easy with TagFly
Want to skip the manual setup? With TagFly, you can get your entire Facebook Pixel and GTM tracking system up and running in minutes, not hours.
If you’re using Shopify, you don’t need to set up Facebook Pixel and Google Tag Manager manually. TagFly simplifies everything in just a few steps:
Step 1: In the TagFly app dashboard, paste your GTM Container ID. This automatically injects Google Tag Manager into your Shopify store without touching any theme files.
Step 2: Generate an Access Token from Meta Events Manager. You’ll find this under:
- Meta Events Manager > Settings > Conversion API > Generate Access Token
- Once copied, paste the token into the corresponding field in TagFly.
Step 3: Add your Meta Pixel ID and enable both Facebook Pixel and Conversion API toggles in the app.
TagFly will instantly track key eCommerce events like ViewContent, AddToCart, and Purchase, then send them to Meta via both browser and server (Pixel + CAPI).
Thanks to built-in deduplication logic and pre-defined event tracking, you get cleaner data, better match rates, and no missed conversions. What normally takes hours to configure can now be done in under 5 minutes.
It’s fast, accurate, and completely no-code, perfect for any Shopify store owner who wants pro-level tracking without the dev headache.
How to Track Events with Facebook Pixel in GTM?
Once your Facebook Pixel is installed, you can track user interactions using three key methods, each suited for different goals:
- Standard Events
- Custom Events
- URL-Based Custom Conversions
Each method helps you measure behaviors that match your campaign objectives, from form submissions to product purchases.
1. Standard Events
These are predefined by Facebook (like Purchase, Lead, AddToCart, ViewContent) and work seamlessly with campaign optimization.
Step 1: Create a new tag in GTM using the Meta Pixel template or Custom HTML.
Step 2: Choose the event type (e.g., Purchase) in the tag settings.
Step 3: Add a trigger based on relevant actions (e.g., “Page URL contains /thank-you”).
Step 4: Test using GTM Preview mode and Facebook Pixel Helper to ensure it fires correctly
2. Custom Events
When your desired action isn’t in Facebook’s standard list, like watching a video or clicking a specific button, go custom.
Step 1: Set up a trigger in GTM targeting that interaction (e.g., Click or Form Submission).
Step 2: Create a Custom HTML tag with:
<script>
fbq(‘trackCustom’,’ButtonClicked’,{button: ‘Download PDF’});
</script>
Step 3: Link your trigger to this tag.
Step 4: Preview and verify in GTM and Pixel Helper.
3. URL-Based Custom Conversions
Don’t want tags? Facebook’s Custom Conversions can track page visits defined by URL, like thank-you pages, via GTM’s standard PageView tag.
Step 1: Fire the PageView pixel via GTM on all pages.
Step 2: In Facebook Events Manager, create a Custom Conversion based on URL rules (e.g., URL contains /order-confirmation).
Step 3: Use that conversion as your campaign goal or audience filter.
⚠️ Final Tip: Always test each setup using both GTM Preview mode and the Facebook Pixel Helper to ensure your events fire properly before going live.
Meta Pixel and Google Tag Manager Best Practices
A proper setup of Meta Pixel with Google Tag Manager goes far beyond just pasting code, it’s about building a tracking foundation that scales, delivers clean data, and respects privacy compliance. Below are key best practices to follow:
1. Implement Facebook Conversion API for Server-Side Tracking (highly recommended)
While client-side tracking (via browser Pixel) is useful, it’s becoming increasingly unreliable due to browser privacy restrictions, ad blockers, and cookie limitations. This is where the Facebook Conversion API (CAPI) steps in.
CAPI allows you to send events directly from your server to Meta, bypassing the browser entirely. As a result, you get higher event match rates, better data consistency, and more reliable attribution, even when browser-based tracking fails.
To implement it effectively:
- Use tools like TagFly or server-side GTM containers to simplify setup and reduce custom coding
- Mirror your Pixel events server-side, such as Purchase, AddToCart, ViewContent, etc. So Meta gets a full picture of the customer journey
- Use event_id values to deduplicate events that may be tracked both client-side and server-side
This hybrid tracking model (Pixel + CAPI) gives you the most accurate and resilient setup available for modern ad measurement.
2. Use GTM Variables Effectively
GTM variables allow you to dynamically pull user data like page URLs, click classes, button texts, or custom JavaScript values, without touching your site’s code. These variables can be injected into Meta Pixel events to provide richer context and more accurate tracking.
For example, you can track which specific CTA button was clicked or what product category the user viewed.
Tools like TagFly can help auto-populate GTM data layer variables for Meta, GA4, TikTok, and Google Ads, reducing setup time.
3. Naming Conventions & Consistency
Use a clear, consistent naming structure across tags, triggers, and variables. This helps you (and your team) easily identify what each tag does, especially when managing large setups or multiple clients.
A format like:
Meta – Purchase – ButtonClick
is easier to manage than vague names like Tag 3 or Click Event.
Consistency pays off when debugging, collaborating, or scaling across multiple stores and campaigns.
4. Set Up Multiple Pixels for Different Stores or Ad Accounts
If you’re managing multiple stores or advertising accounts (e.g., for clients in different regions), you’ll likely need to use multiple Meta Pixels. GTM allows this flexibility; just make sure each pixel has its own tag and that you assign precise, non-overlapping triggers.
For instance, a US store and UK store may use the same website but require separate Pixels for localized ad tracking, audiences, and conversions.
5. Respect User Consent (GDPR, CCPA, etc.)
Tracking responsibly means respecting user privacy laws like GDPR or CCPA. Before firing any Meta Pixel events, especially those involving cookies or personal data, ensure the user has given consent.
To do this in GTM:
- Use a Consent Management Platform (CMP) or a custom consent mechanism
- Configure GTM to delay Pixel tags until consent is granted
- Leverage GTM’s built-in Consent Initialization and Consent types
Failing to comply can result in data inaccuracies, policy violations, or even legal risk.
Common Mistakes When Using Facebook Pixel with Google Tag Manager
Duplicate events
One of the typical problems that occurs with events is unintentionally firing the same events twice. This mostly happens when merchants take advantage of GTM’s default triggers and Facebook’s automatic event detection.
Events like “PageView” and “Purchase” may be double-counted, which will definitely distort your data and create confusion in ad attribution. To get rid of this, you should double-check the GTM triggers and disable any duplicate Facebook event setups within Meta Events Manager.
GTM firing issues
Incorrect trigger setup inside GTM might prevent events from firing at all or cause them to fire on unwanted pages. This usually happens because the wrong type of trigger has been chosen (e.g., Page View rather than DOM Ready) or because of misconfigured filters.
Check your trigger logic for each tag and use GTM’s Preview Mode to be sure that tags are firing as intended. Use extra caution if you’re working with a single-page app or dynamically loaded page content.
FAQs
Can I use Facebook Pixel without GTM?
Yes, and there are two ways:
- Direct code injection: Manually add the Pixel code to your site. Cons: Requires technical skills, harder to manage, and may affect site speed.
- Platform integration: Use built-in Pixel support on Shopify, Wix, etc. Cons: Limited customization, won’t support advanced or custom event tracking.
However, using Google Tag Manager provides that layer of flexibility, control, and organization, especially when managing multiple tags and tracking events of sophistication.
Is Meta Pixel and Facebook Pixel the same?
Yes, Meta Pixel is the new name for what was previously called Facebook Pixel. The change in branding came about in line with their shift from platform to platform, but most of the functionalities of it remain focused on tracking user behavior, conversions, and assisting in ad delivery optimization.
Does GTM slow down my site?
GTM, when set up correctly, should not interfere with site performance much. Instead, it can ease script management and has tag management in order. Too many heavy third-party tags or misfiring tags will cause this to be slower.
Conclusion
Setting up Facebook Pixel and Google Tag Manager together gives your business more flexibility, control, and scale. Whether you’re tracking standard events like purchases or creating your own triggers, GTM should make tag deployment easy and more accurate in the data it collects, so just remember to test, follow naming best practices, or avoid common pitfalls like duplicate events.
If you want a setup that grows with your store and campaigns, combining Facebook Pixel and GTM is one of the smartest moves you can make.