If you’ve ever struggled with tracking events in Google Tag Manager, this guide breaks down dataLayer.push() in the simplest way possible – no coding skills needed, no confusing jargon. By the end, you’ll know exactly how to use dataLayer.push to track events, improve analytics, and optimize marketing, without searching anywhere else.
What is a dataLayer.push?
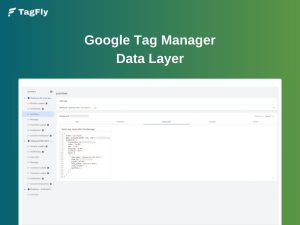
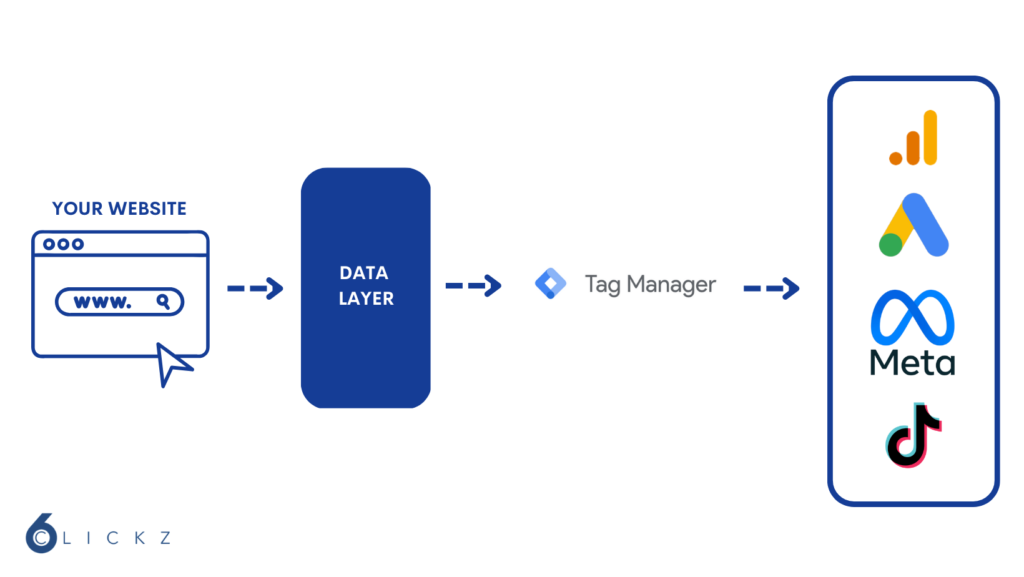
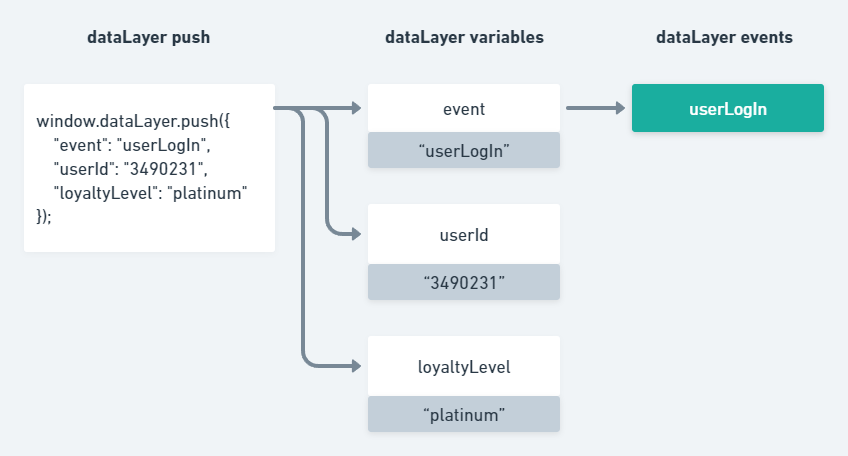
dataLayer.push is a method in Google Tag Manager (GTM) to dynamically push data into the Data Layer. The Data Layer is a JavaScript object used for collecting and organizing data about interactions on a site and making it available in GTM for tag firing and data transmission to analytics and marketing tools.
Using dataLayer.push, one can add new information such as user actions, e-commerce transactions, or page metadata without changing any part of the page itself, thus ensuring adaptability, accuracy, and improved tracking of user behavior.
Why Use dataLayer.push?
1. Accurate and Reliable Data Collection
There are many tracking techniques that depend on HTML, CSS, or JavaScript elements and will break with changes in the site structure.
With dataLayer.push, event tracking is no longer tied to frontend design. Instead, all data is stored in the Data Layer, allowing GTM to retrieve and process it independently of DOM elements. This ensures stability, even when developers modify the website’s layout or class names.
2. Flexible and Dynamic Tracking
Tracking the currently loaded content and also single-page applications (SPAs) is a challenge to traditional methods.
dataLayer.push collects user interactions without reloading pages, essential for tracking events such as cart updates and AJAX submissions, and for monitoring pop-ups and form submissions in terms of touchpoint data accuracy.
3. Better Event Management and Customization
With dataLayer.push(), businesses gain greater flexibility in tracking by defining their own custom events instead of relying solely on GTM’s default triggers. Custom event tracking allows you to add meaningful details, such as user location or referral source, making reports more insightful and reducing unnecessary event noise.
How Does dataLayer.push Work?
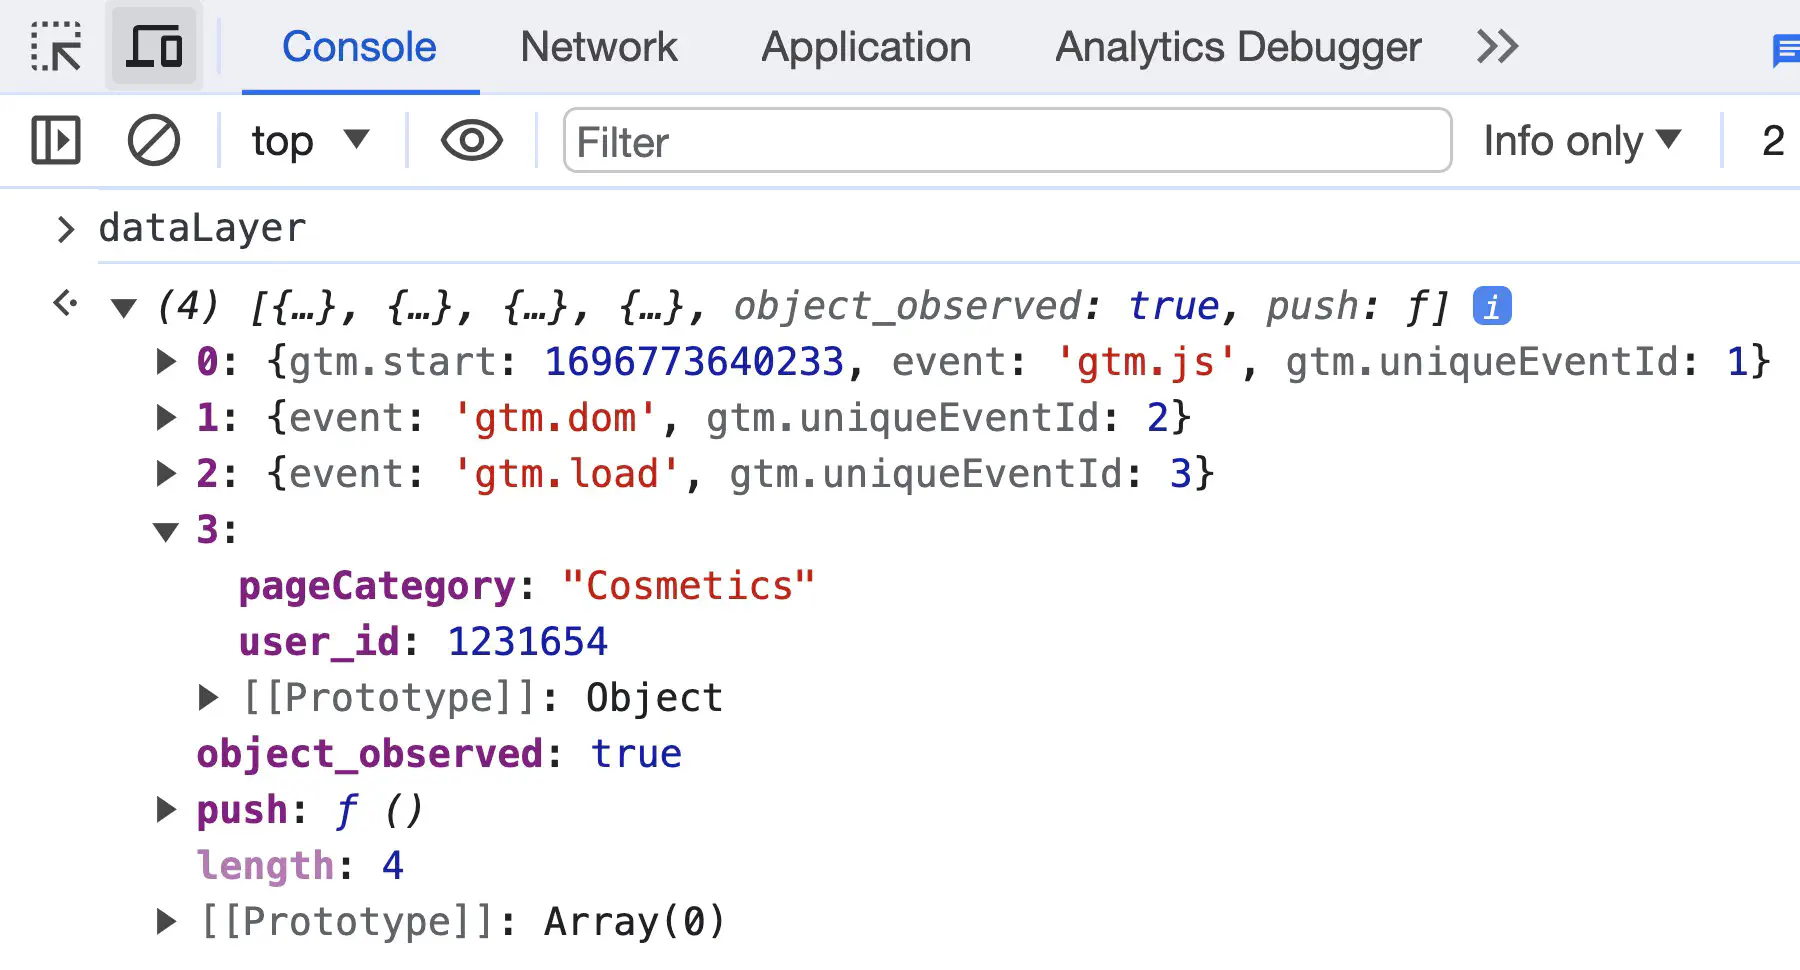
When new information is added to the Data Layer using dataLayer.push, GTM can recognize it as a custom event. These events help marketers and developers track user interactions efficiently without relying on static HTML elements or CSS selectors, ensuring more accurate and flexible data collection.
dataLayer.push works by appending data to the existing Data Layer array, which GTM then processes in real-time. This value adds dynamic event tracking by defining events for clicks, forms, and e-commerce activities without changing anything in the core code on the website.
Once an event is pushed in GTM, the event can be used to trigger tags, send data to analytics tools, or initiate remarketing campaigns.
DataLayer Push Examples: Basic to Advanced
Example 1: Simple Button Click Event (Easy)
Let’s track when a user clicks a “Subscribe” button on the website.
<script>

window.dataLayer = window.dataLayer || [];

window.dataLayer.push({

  'event': 'subscribe_button_click'

});

</script>
What Happened Here?
I simply push an event named “subscribe_button_click” into the Data Layer. Google Tag Manager can listen for this event and trigger actions such as Google Analytics event tracking or Facebook Pixel tracking when the button is clicked.
Example 2: Tracking a Form Submission with User Data (Intermediate)
Now, let’s track when a user submits a newsletter signup form and include additional user details.
<script>

window.dataLayer = window.dataLayer || [];

window.dataLayer.push({

  'event': 'newsletter_signup',

  'userEmail': '[email protected]',

  'formLocation': 'footer'

});

</script>
What Happened Here?
- The event “newsletter_signup” is triggered when a user submits the form.
- We capture the user’s email and the form location (in this case, the footer).
- GTM can use this data to trigger tags, such as sending the event to Google Analytics, Facebook Pixel, or email marketing platforms.
Example 3: Tracking an E-commerce Purchase with Multiple Products (Advanced)
In a more complicated example, we are tracking a purchase event, where several products are purchased, and we register additional information such as transaction ID, total value, currency and tax.
<script>

window.dataLayer = window.dataLayer || [];

window.dataLayer.push({

  'event': 'purchase',

  'transactionId': 'TXN12345',

  'transactionTotal': 150.75,

  'currency': 'USD',

  'transactionTax': 10.50,

  'products': [

    {

      'productID': 'P123',

      'productName': 'Wireless Headphones',

      'price': 99.99,

      'quantity': 1

    },

    {

      'productID': 'P456',

      'productName': 'Smartwatch',

      'price': 50.76,

      'quantity': 1

    }

  ]

});

</script>
What Happened Here?
The event “purchase” is triggered when a user completes an order.
- I capture transaction details, including the transaction ID, total price, currency, and tax amount.
- I include a list of purchased products, with details like product ID, name, price, and quantity.
- GTM can use this data to trigger: Google Analytics 4 (GA4) e-commerce tracking, Facebook Pixel “Purchase” event, Google Ads conversion tracking.
How to Use dataLayer.push?
To use dataLayer.push, follow these basic steps to set up and implement it in Google Tag Manager (GTM).
Step 1: Initialize the Data Layer
Before pushing any data, ensure that the Data Layer exists on your website:
<script>

window.dataLayer = window.dataLayer || [];

</script>
Step 2: Push Data into the Data Layer
When a user performs an action, you can push relevant data to the Data Layer:
<script>

window.dataLayer.push({

  'event': 'custom_event_name',

  'key': 'value'

});

</script>
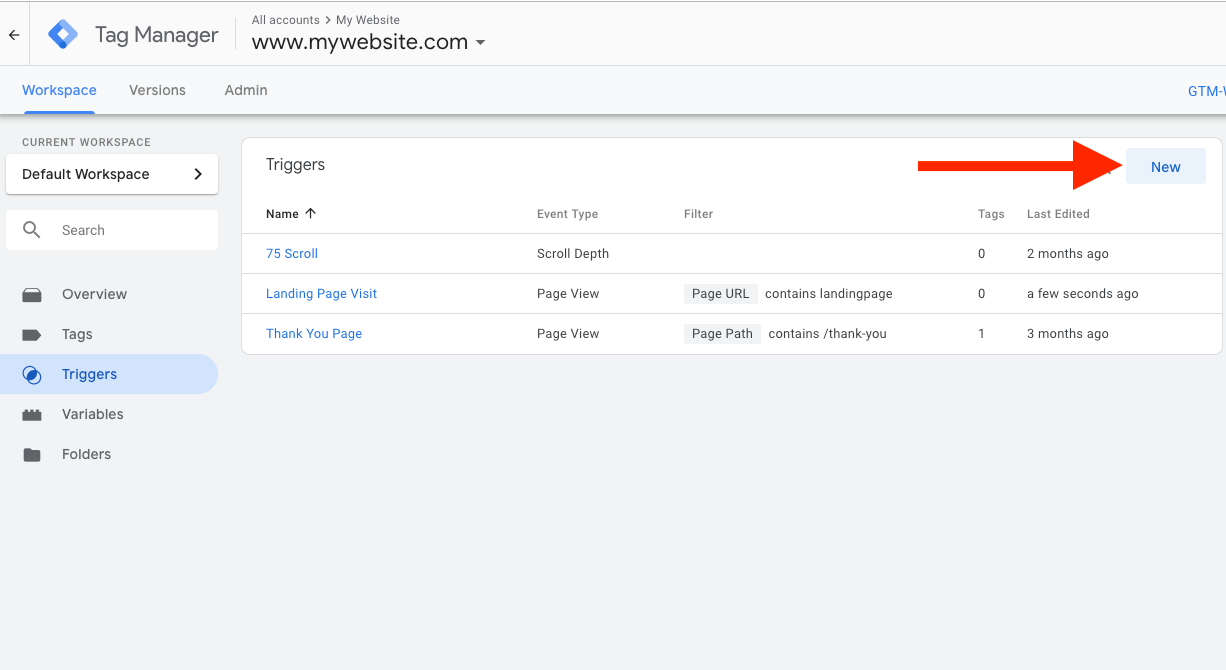
Step 3: Set Up a Trigger in GTM
In Google Tag Manager, go to Triggers > New Trigger.
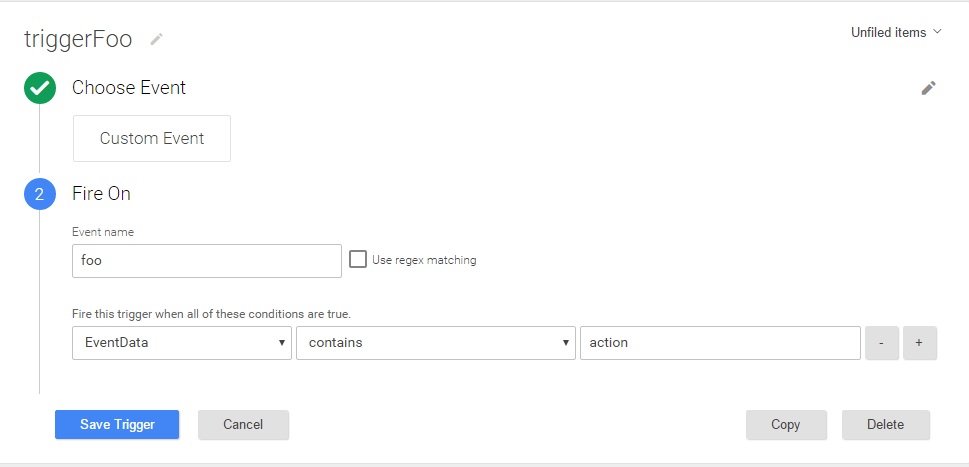
Select Custom Event and enter the event name from your dataLayer.push
Save the trigger.
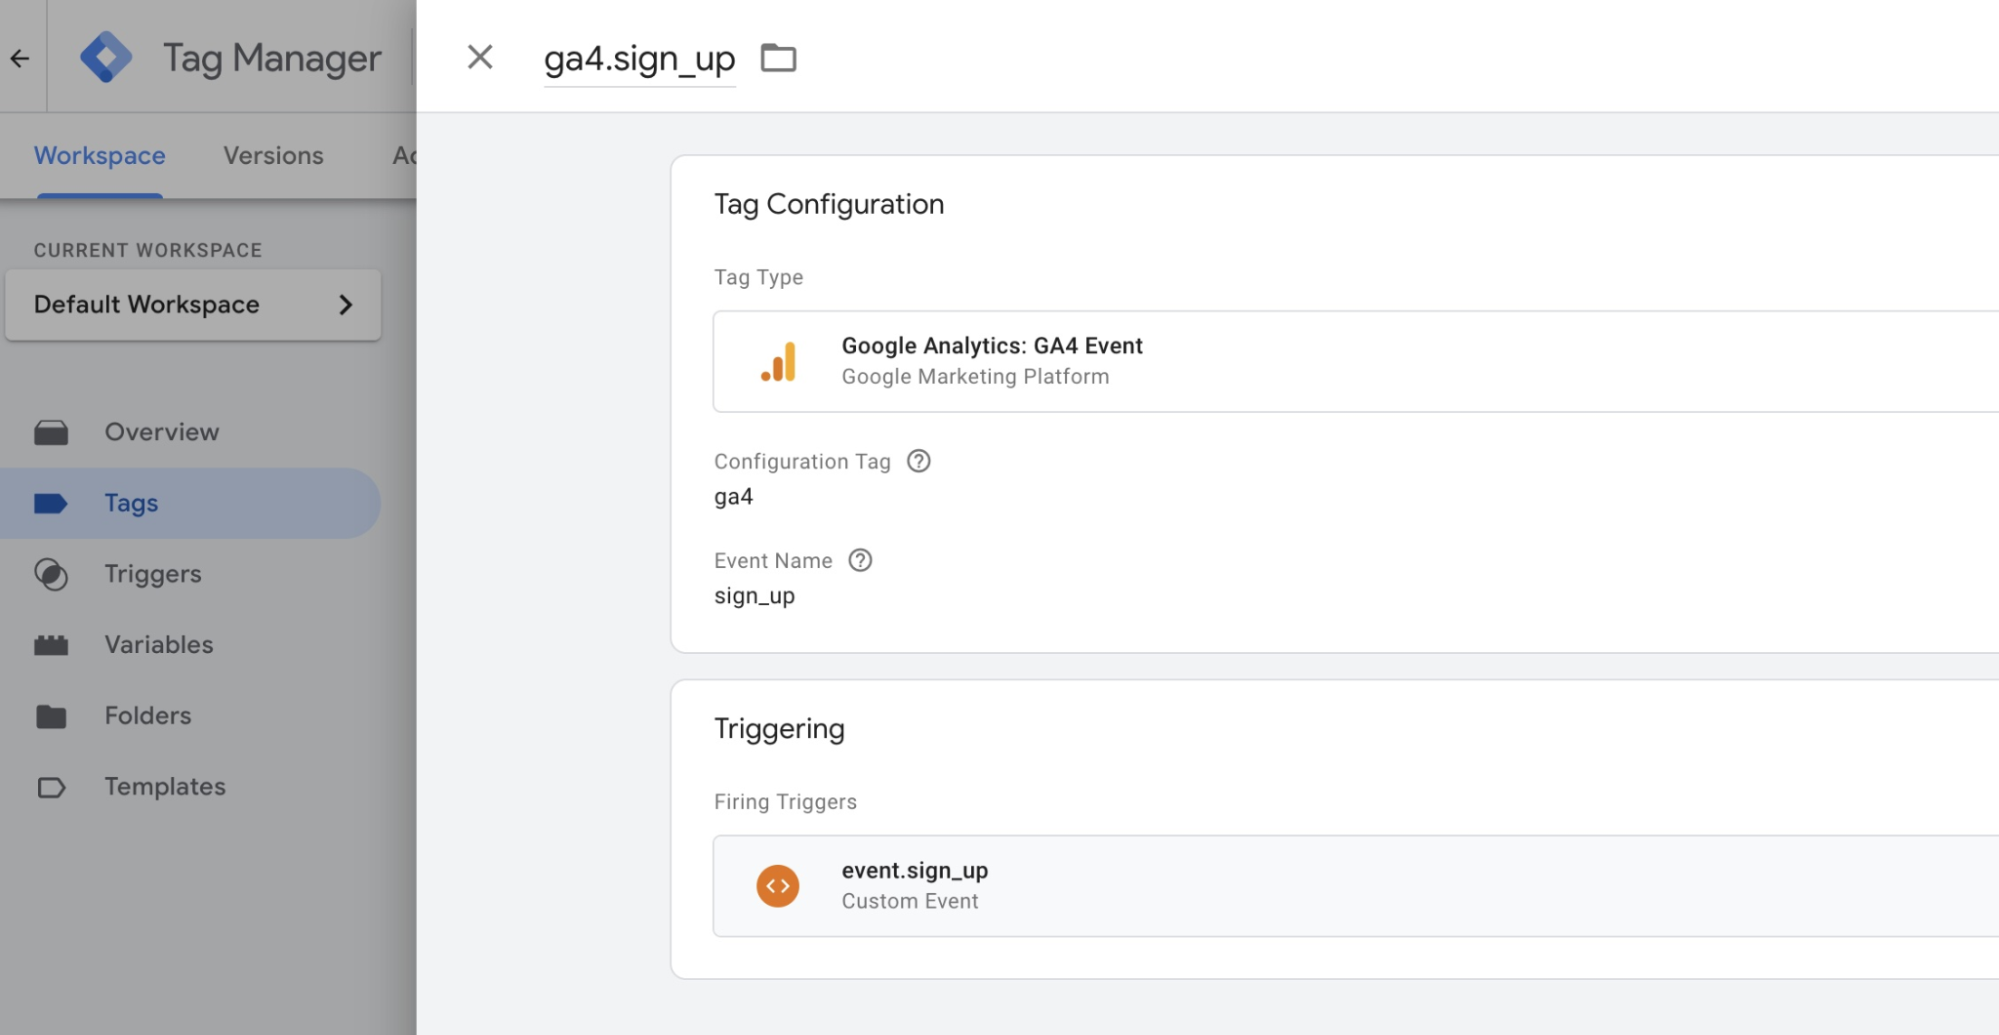
Step 4: Link the Event to a Tag
Create a new Tag (e.g., Google Analytics Event, Facebook Pixel, or Google Ads Conversion).
Assign the Custom Event Trigger.
Save and publish the GTM container.
Set Up dataLayer.push Events Instantly with TagFly
Don’t want to mess with manual event tracking? TagFly takes the headache out of setting up dataLayer.push. Instead of spending hours configuring each event, you get ready-to-use GTM containers for GA4, Facebook, TikTok, and more, no coding needed.
With just a few clicks, you can track everything from purchases to sign-ups and page views, all through Google Tag Manager. It’s super handy whether you’re running a store or managing ads and just want your data to work without the hassle.
Think of TagFly as your shortcut to clean, reliable tracking, so you can spend less time debugging and more time growing your business.
Conclusion
By learning dataLayer.push to its fullest extent in Google Tag Manager, your tracking can become more sophisticated. Instead of depending on static HTML elements for triggers or on obsessive manual setups, you can build a much more flexible, scalable, and accurate tracking system.
It may sound complex to set up, but you don’t have to do it alone with TagFly as it prebuilds GTM containers for you because it understands that tracking can be a tough and long process.